Table of Contents
This quick introduction will help you create your Authlete account to making your first Authlete API call.
An Authlete account is required to configure features through the Management Console.
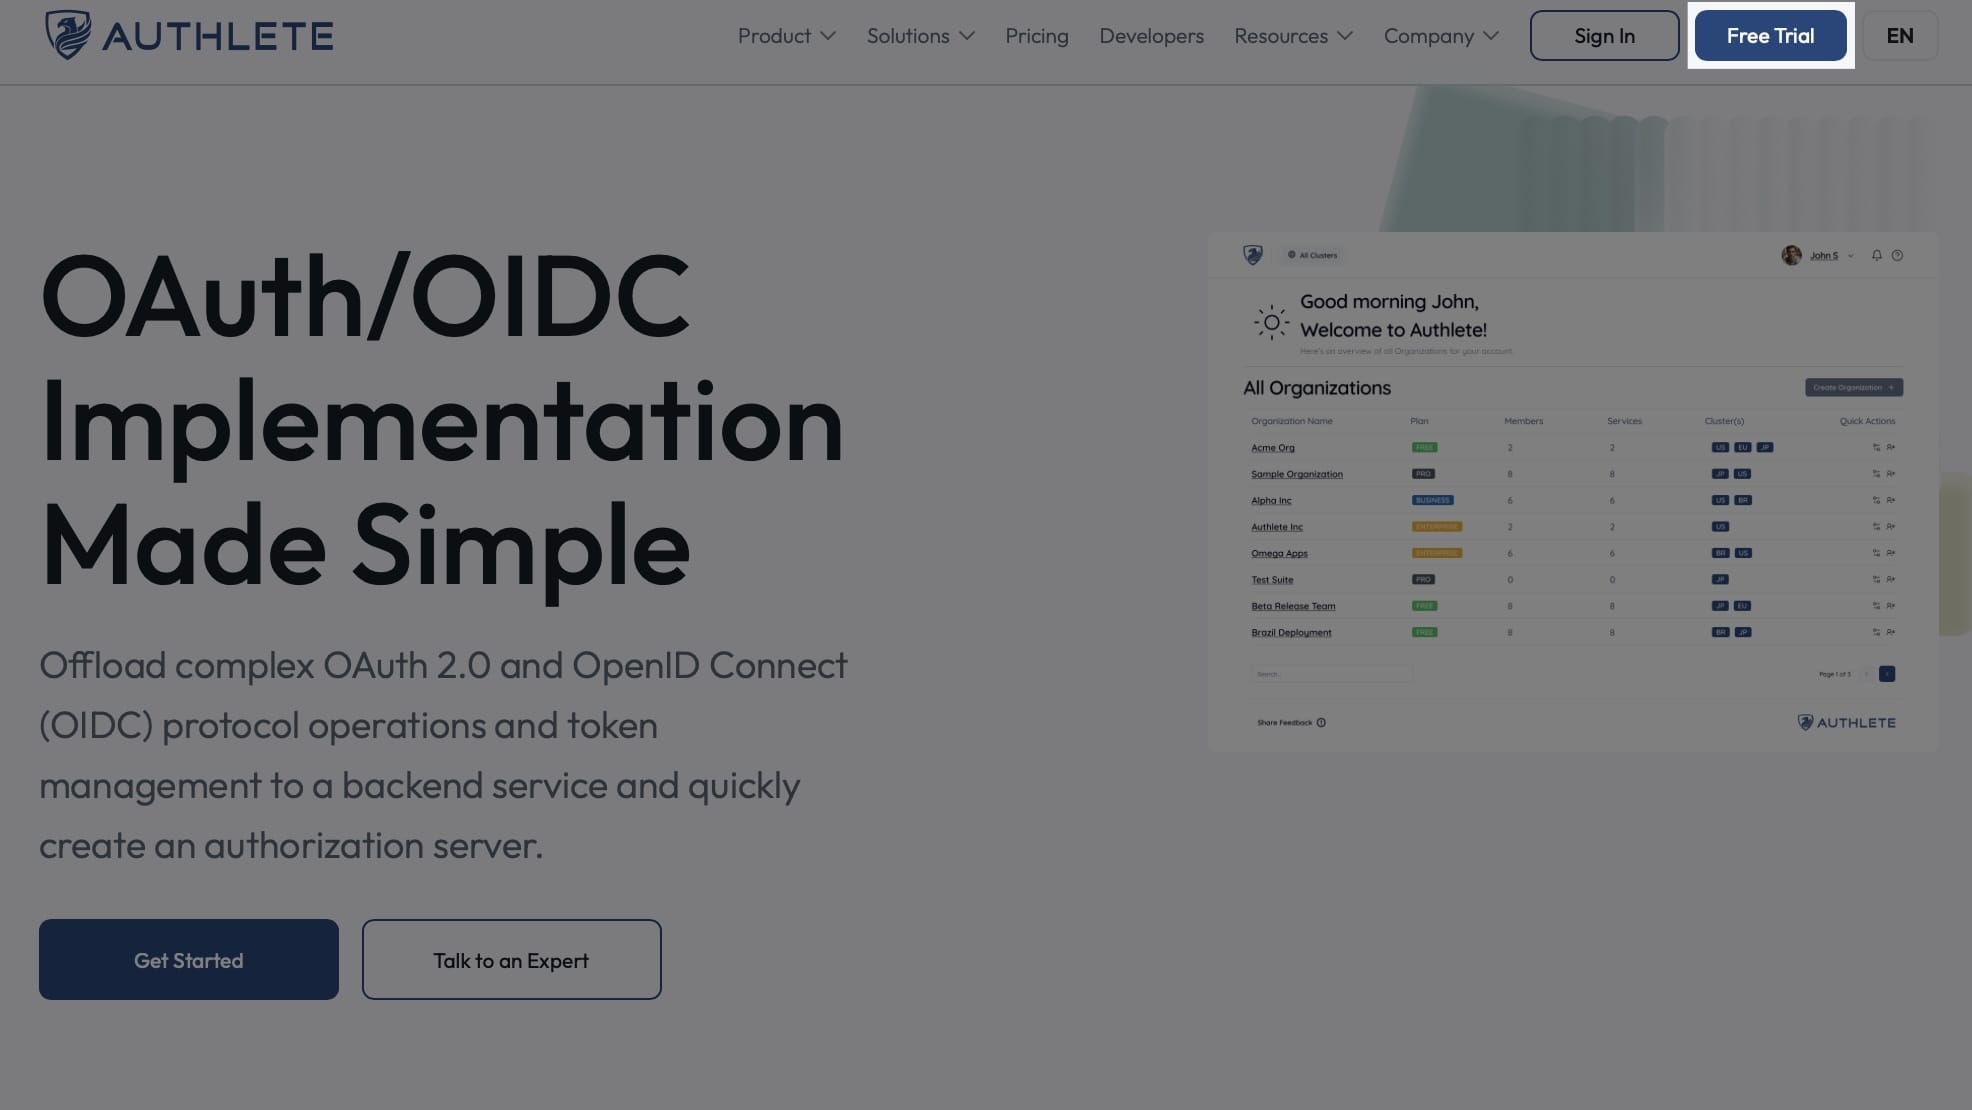
Visit the Authlete website and click “Free Trial” in the top right corner.
Choose your sign-up method. You can use a social account (Google or GitHub) or your email address.

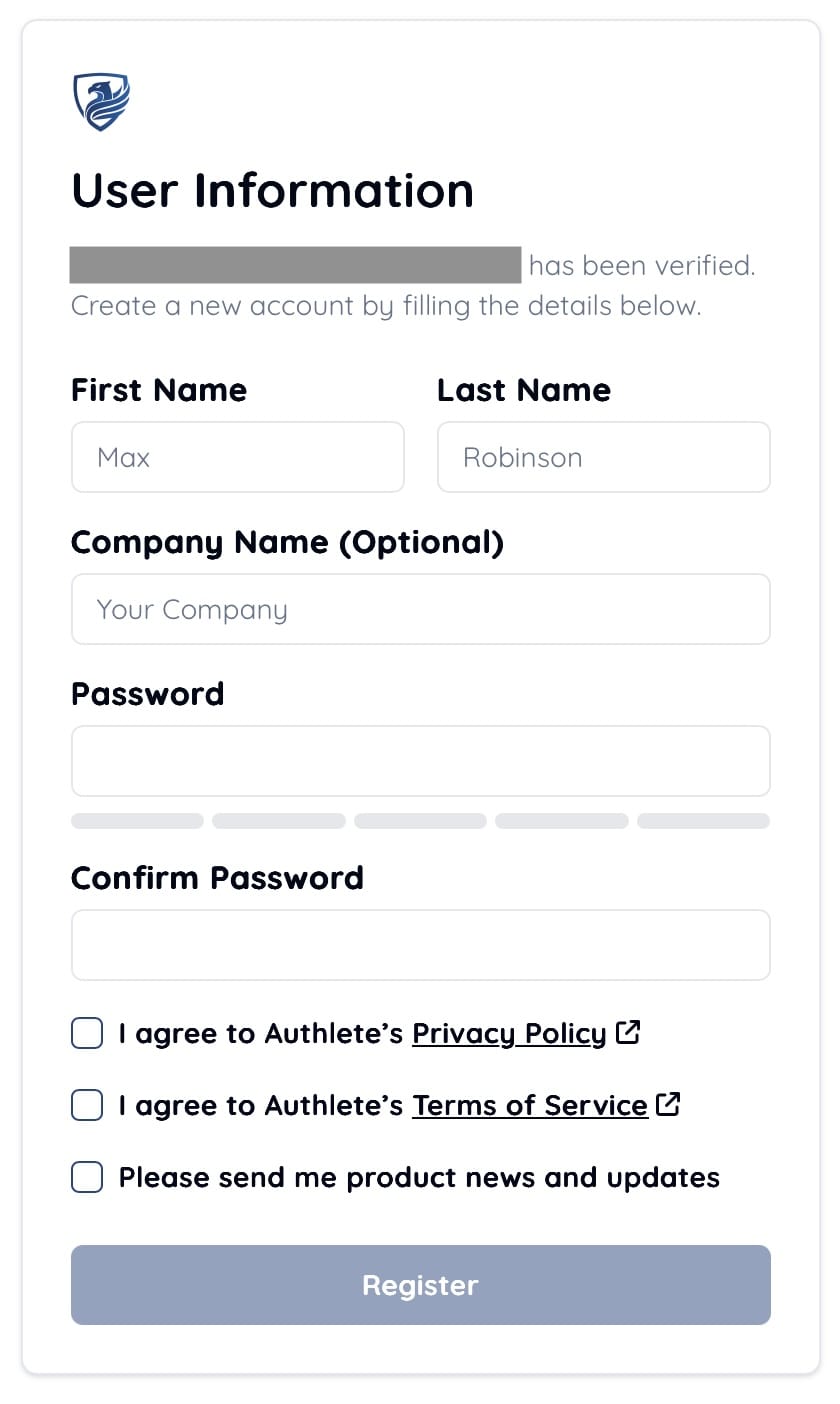
Once your social login or email is verified, you will be directed to a page for user information. Enter your basic details (First Name, Last Name, etc.). Review the Privacy Policy and Terms of Service, then click “Register” to agree and proceed.
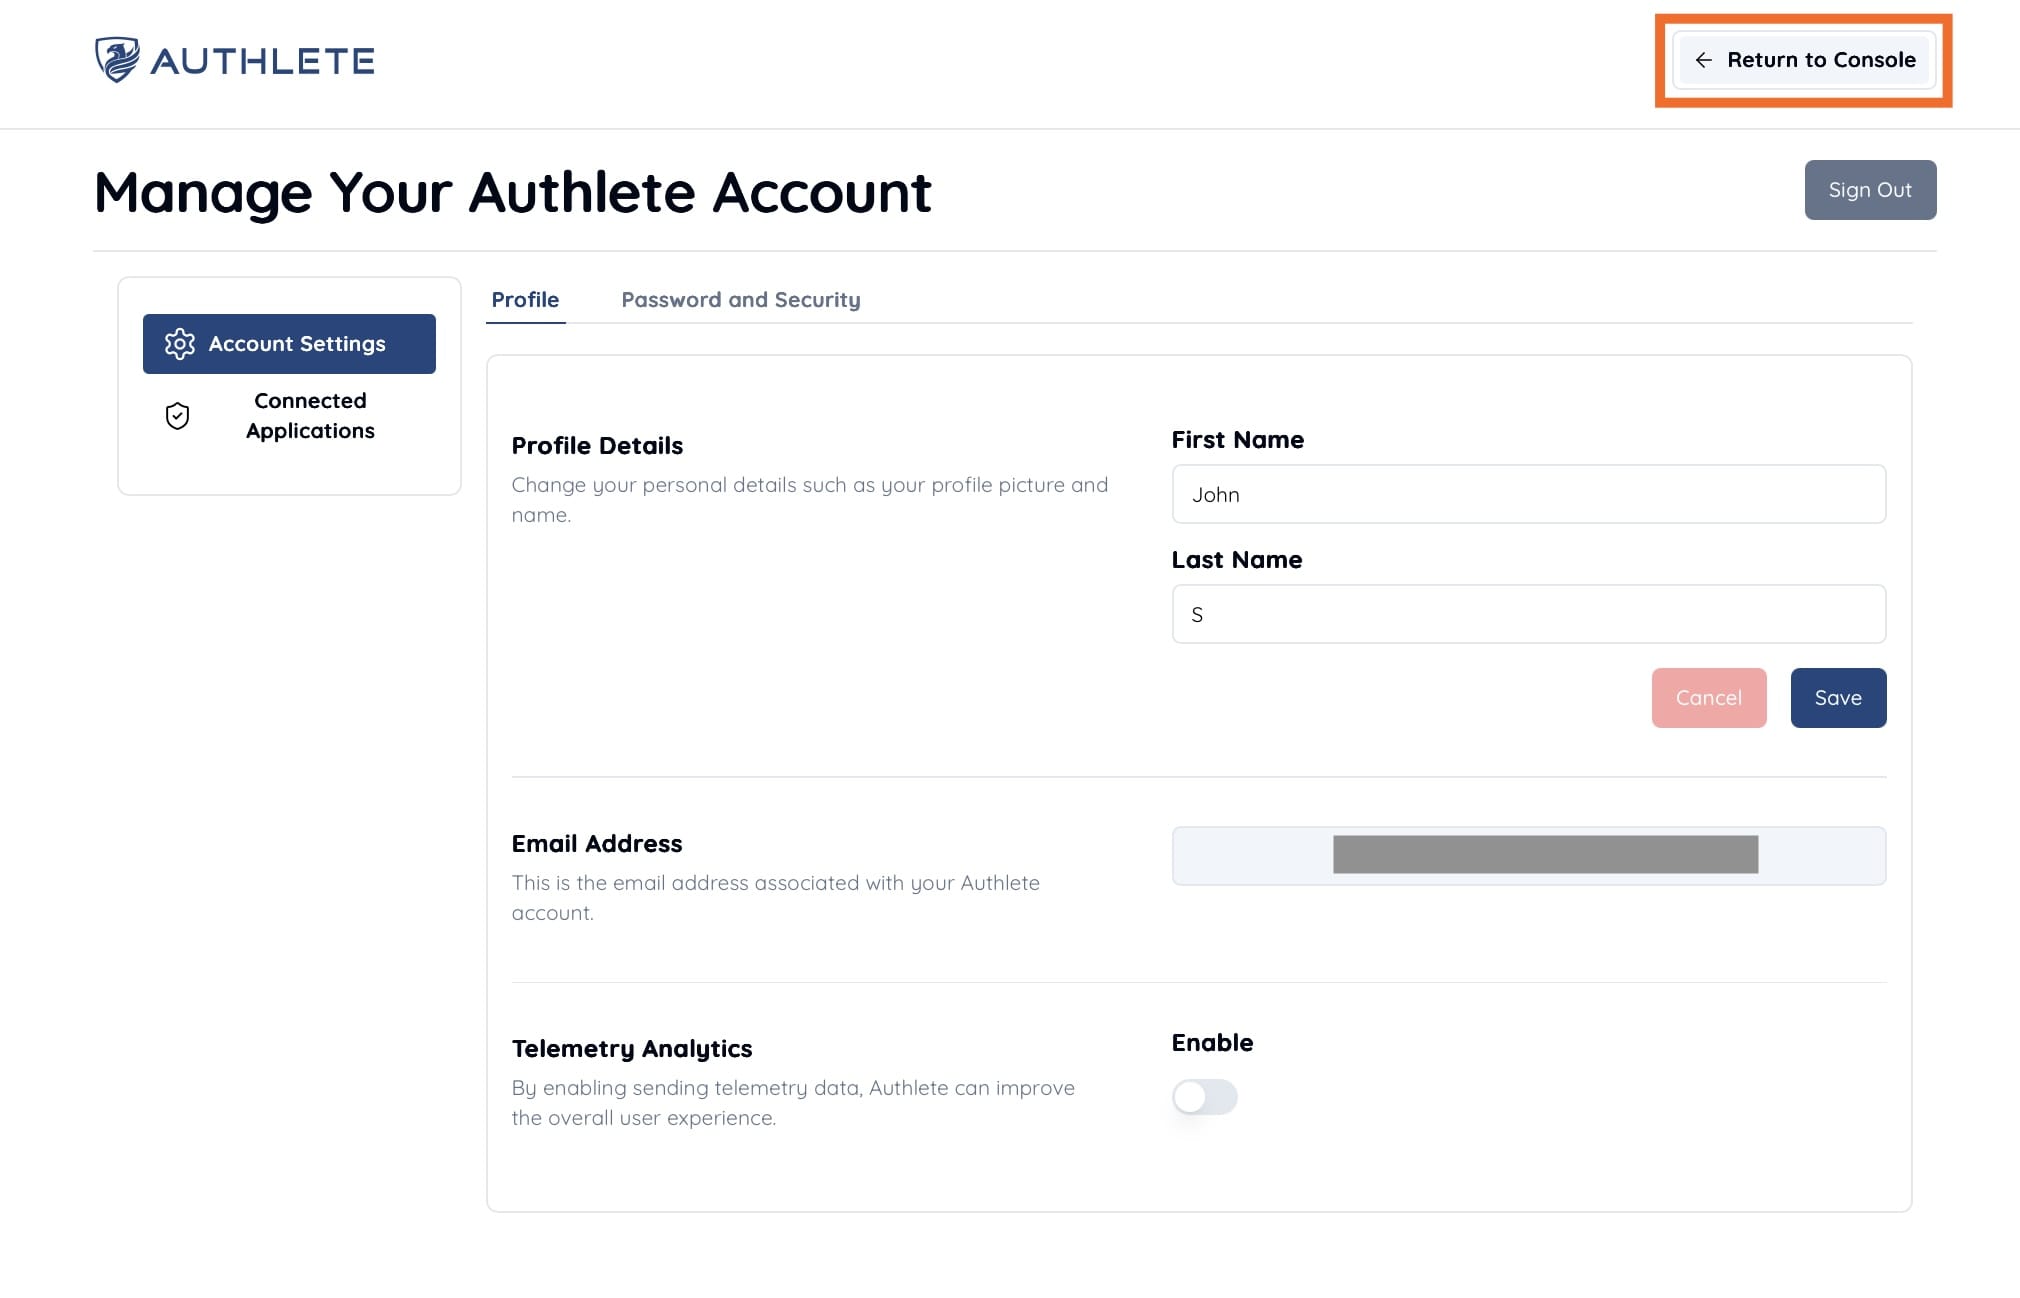
Registration is now complete. If you see the “Manage Authlete Account” page, click “Return to Console” in the top right to return to the Management Console.
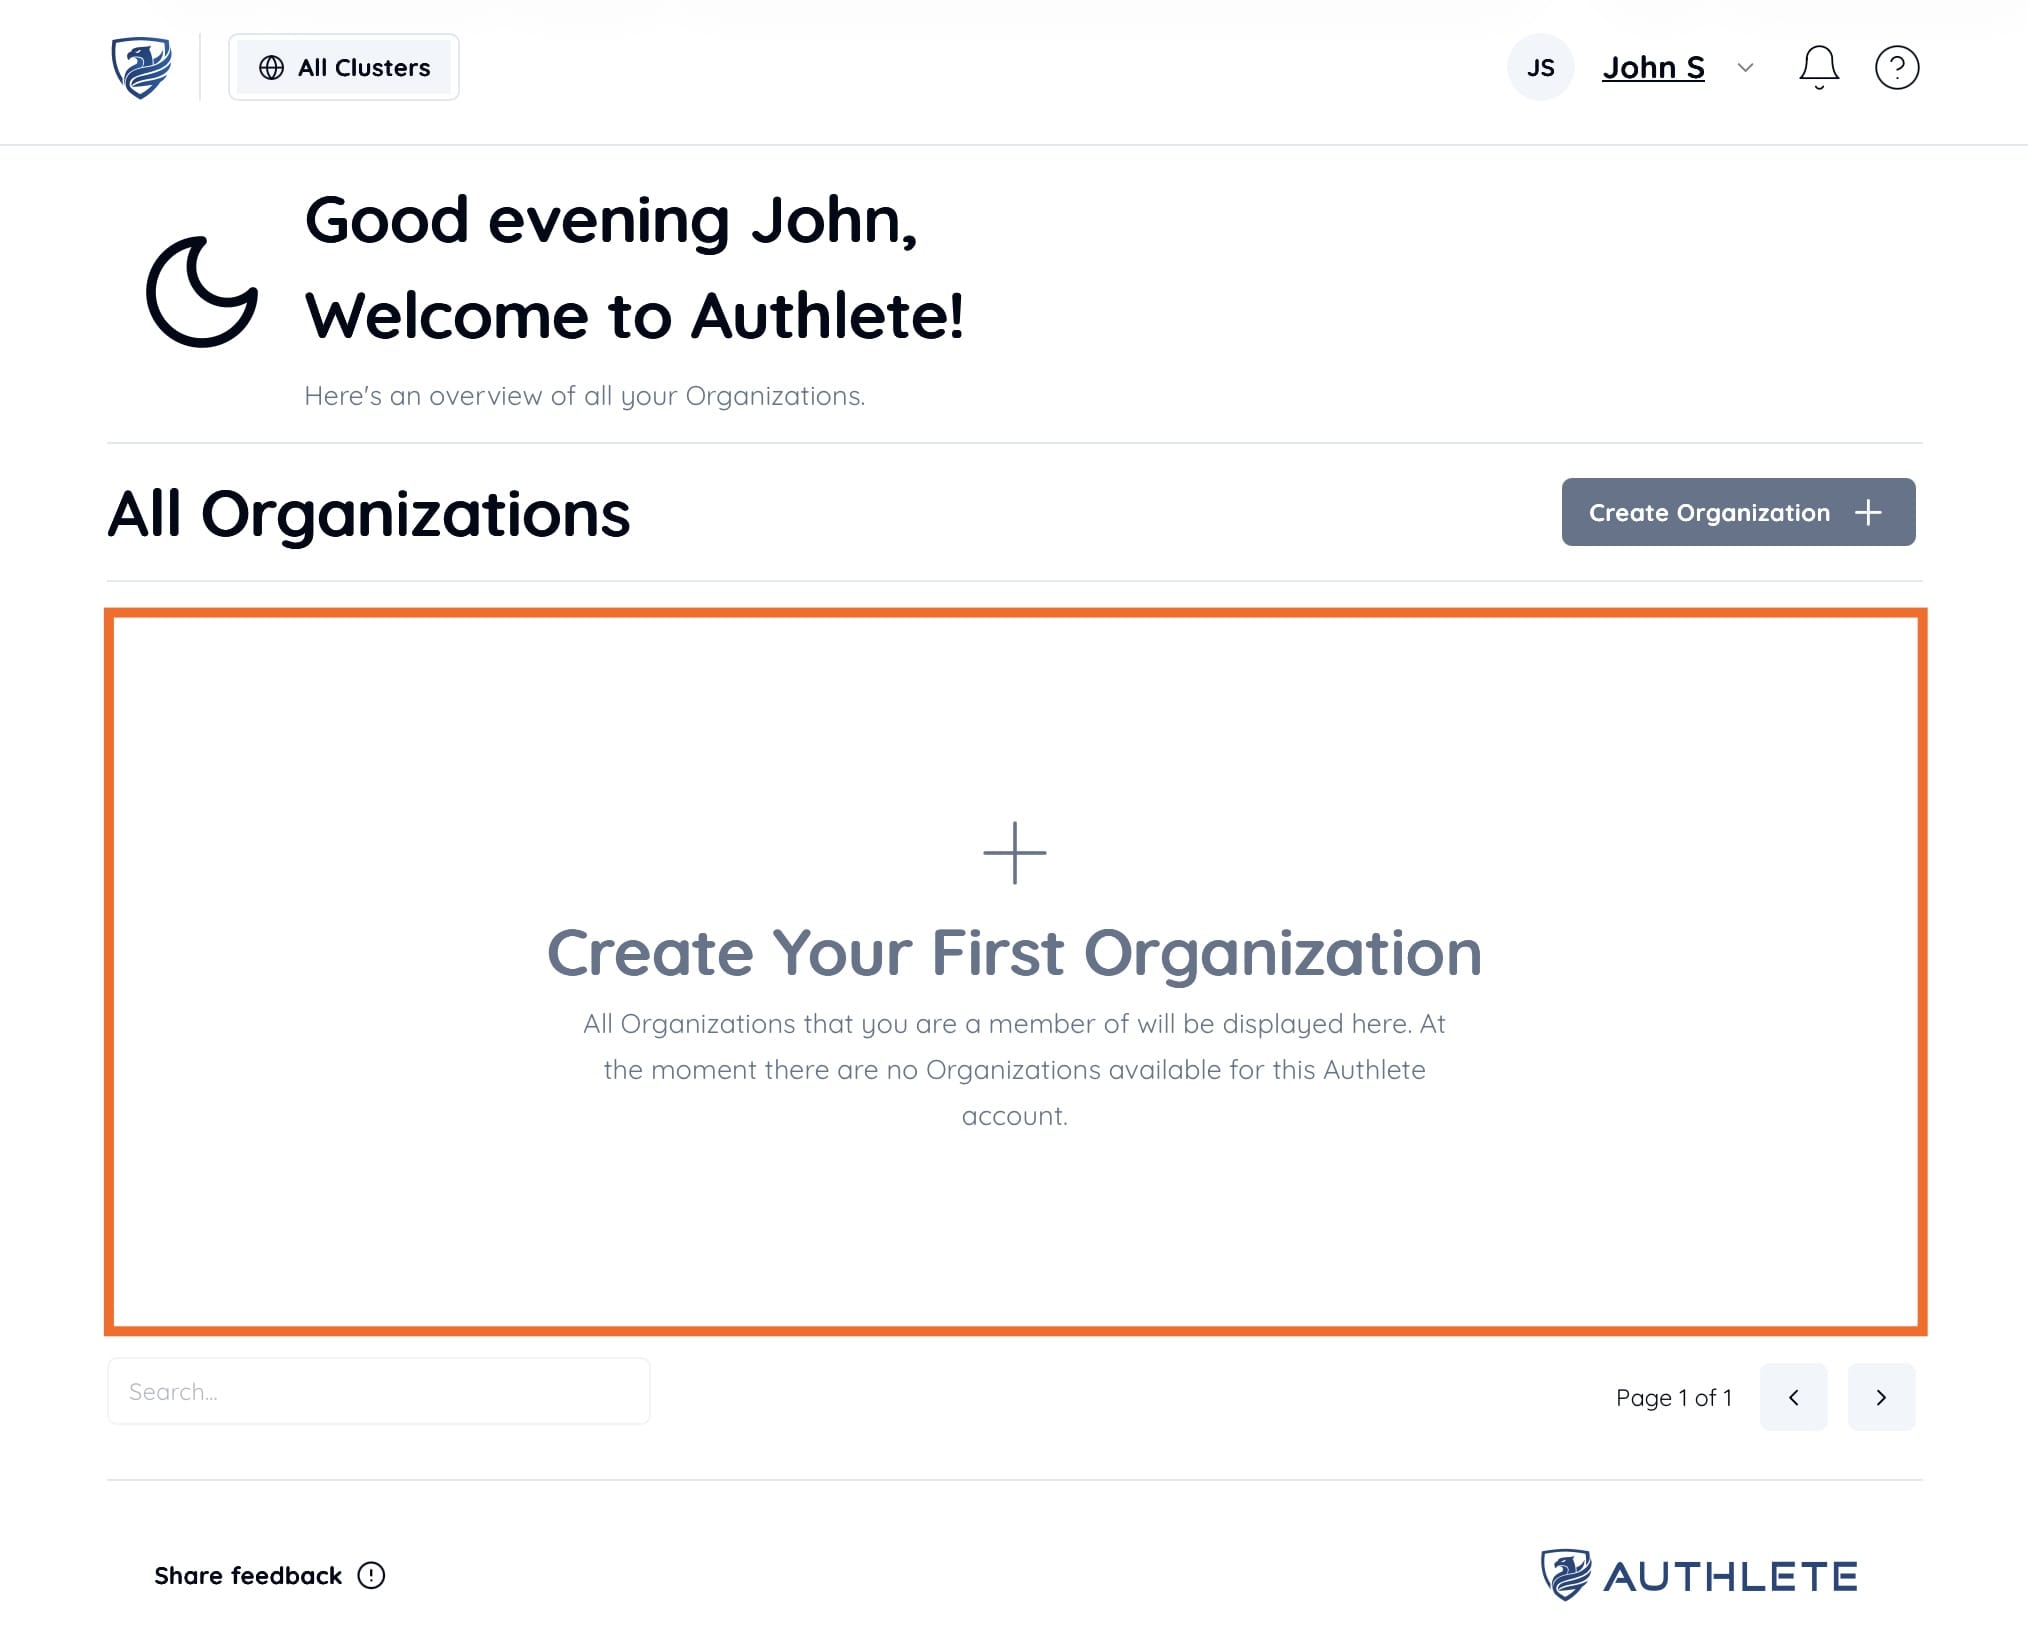
The first page of the Management Console is “All Organizations.” An organization is a group of users who share one or more Authlete services (Authlete API instances that serve as backends for OAuth/OIDC servers). This page displays the organizations you belong to.
Click “Create Your First Organization” to start creating your first organization.
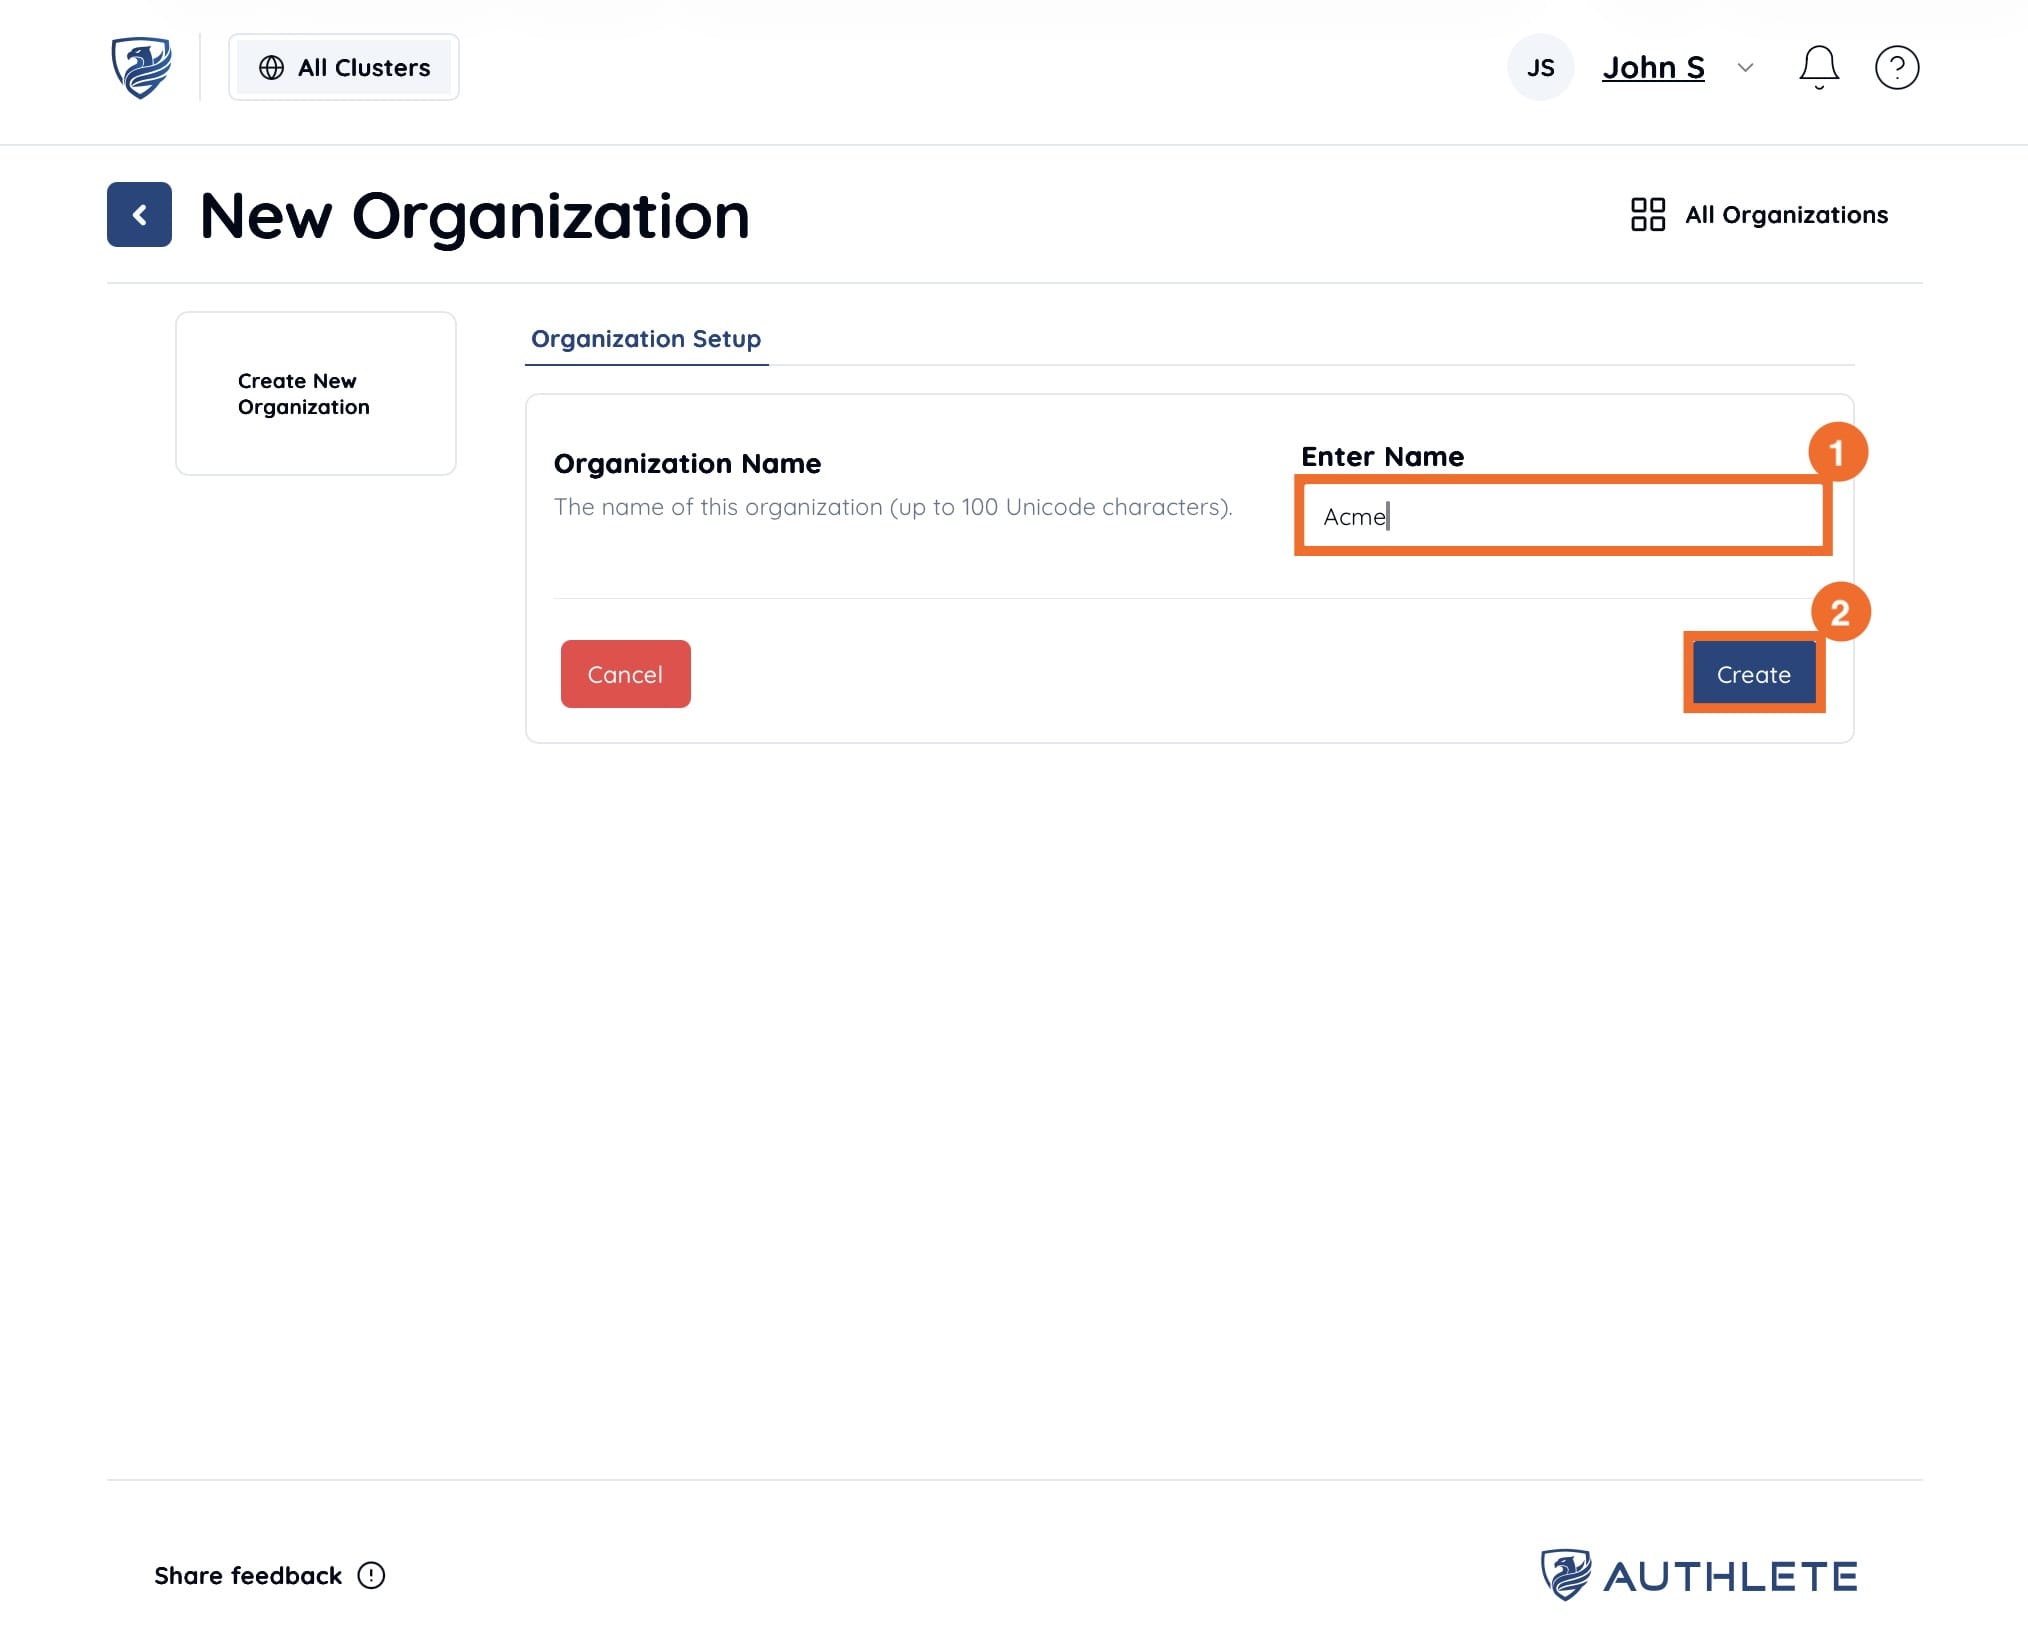
Enter any organization name (e.g., Acme) and click “Create” to create a new organization.
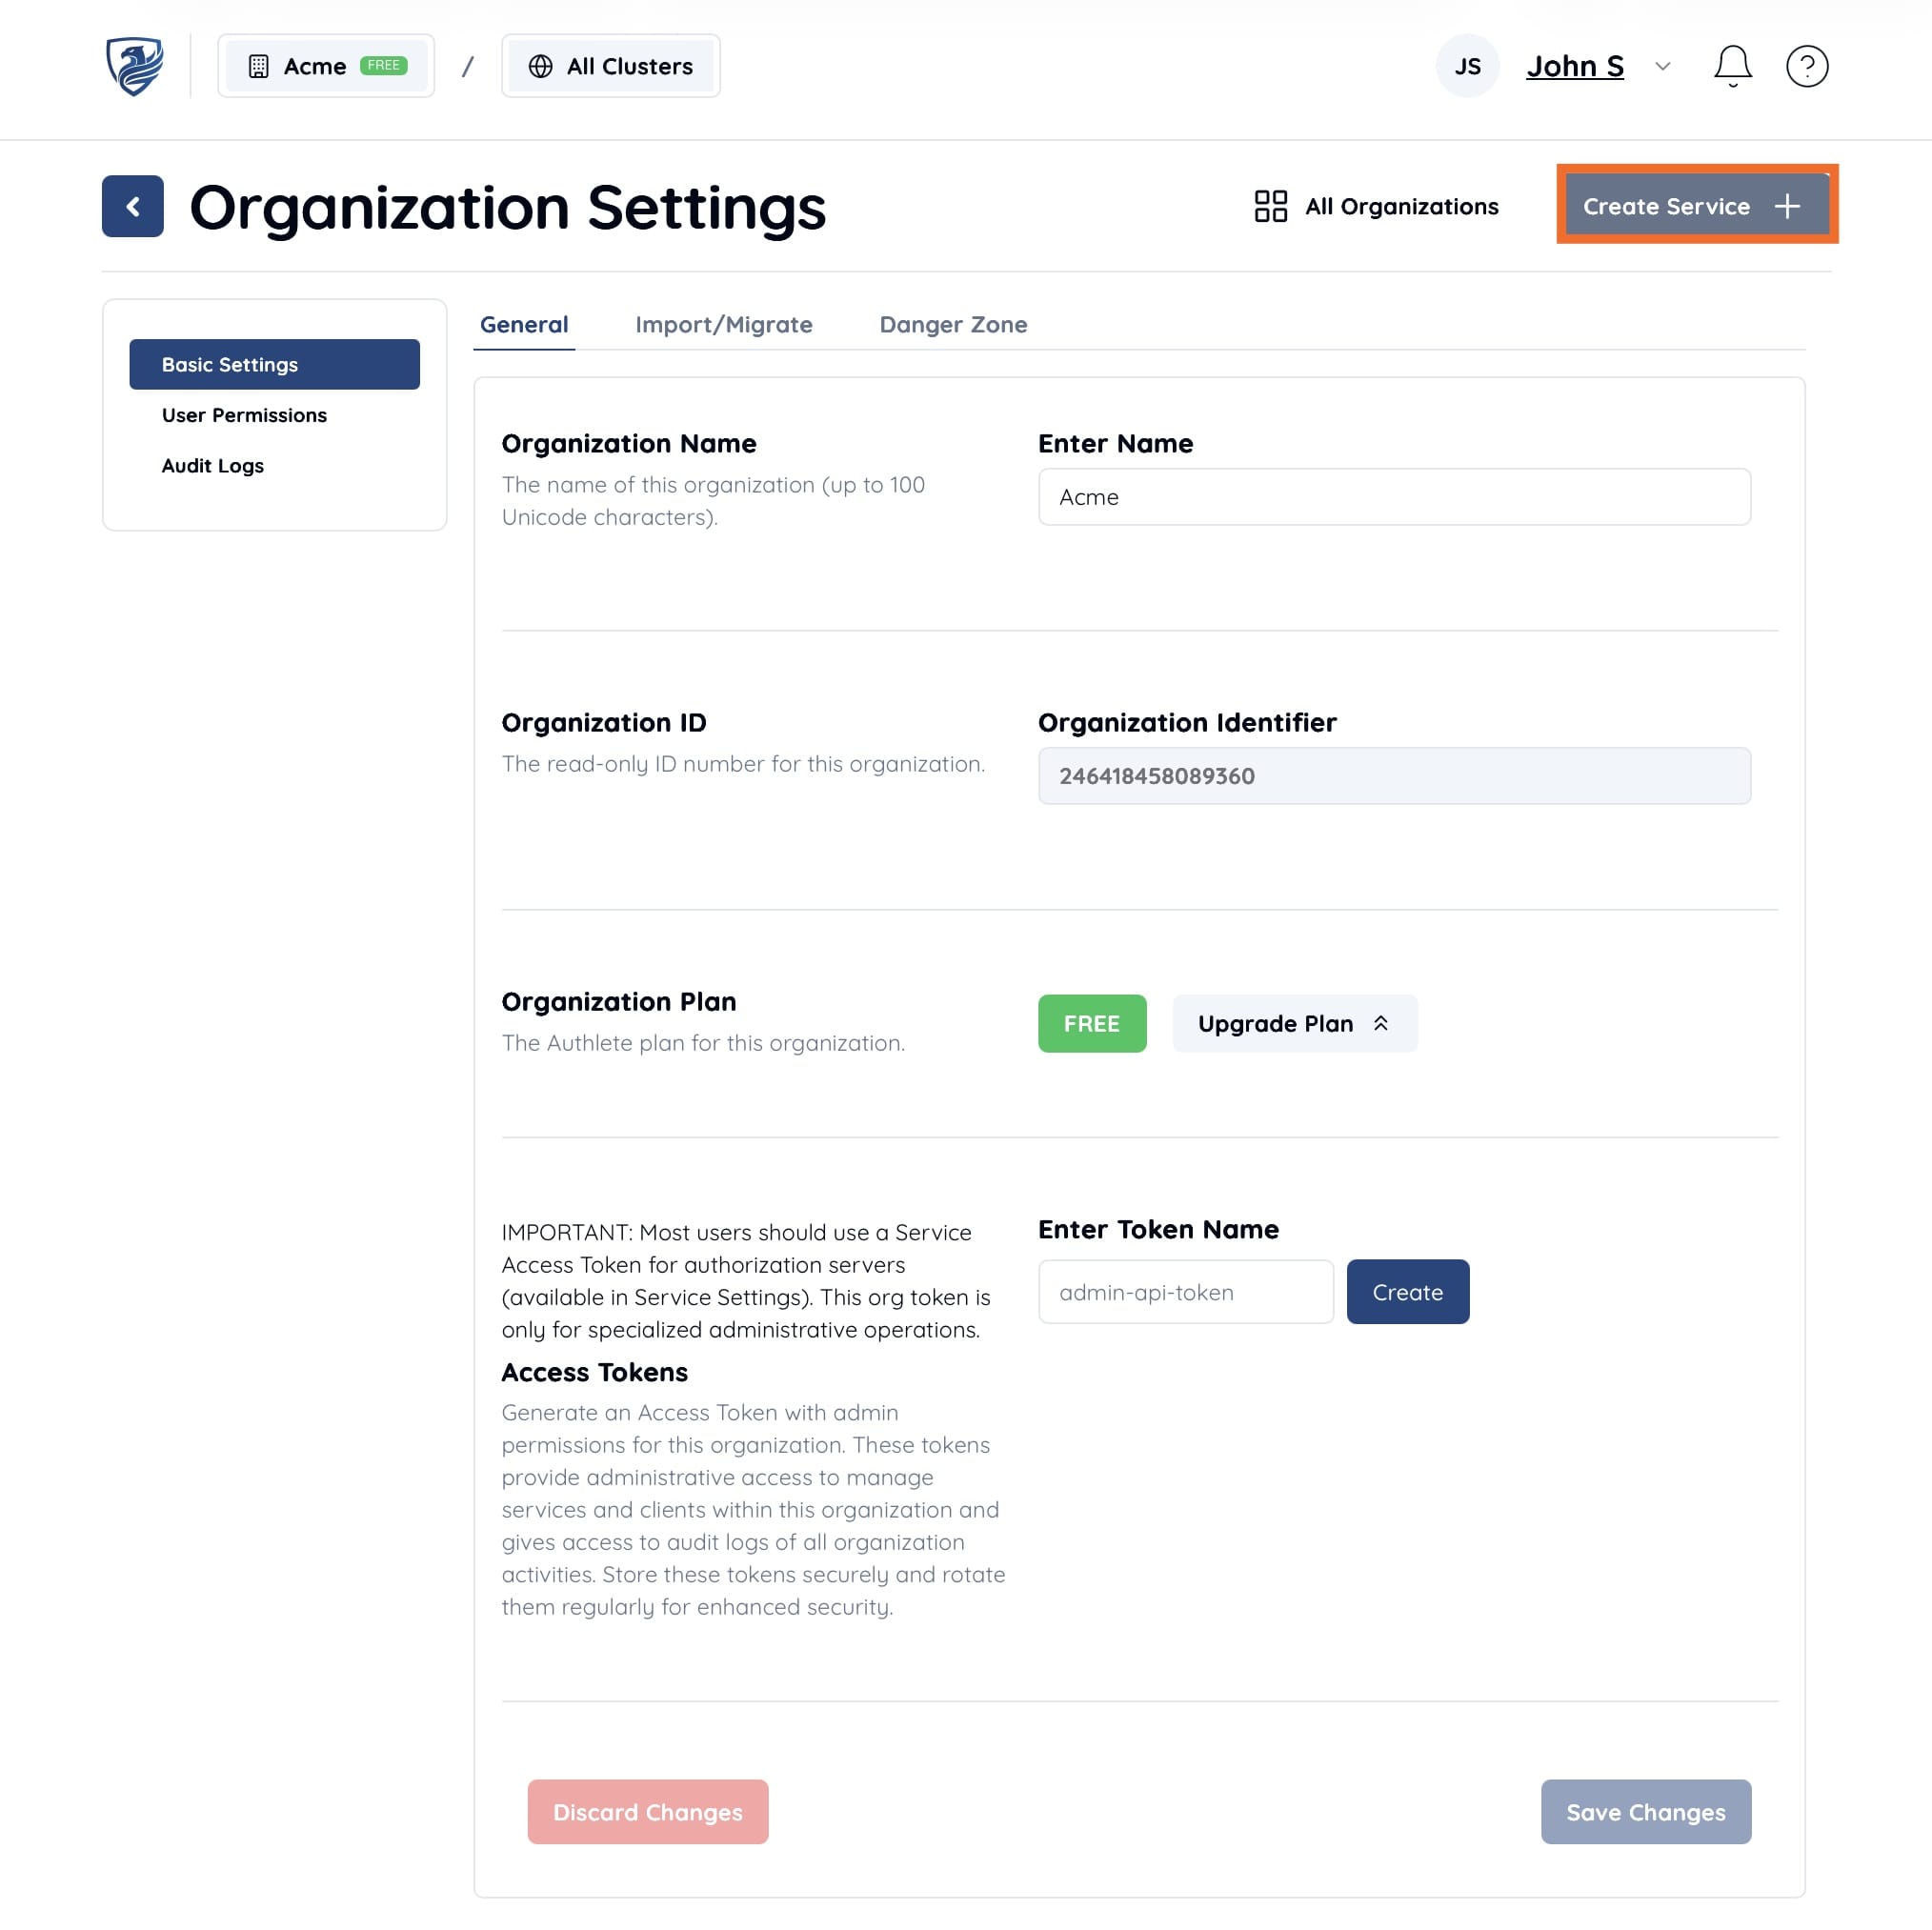
Once you have successfully created an organization, the “Organization Settings” page will appear. Click “Create Service” in the top right to create a new Authlete service within this organization.
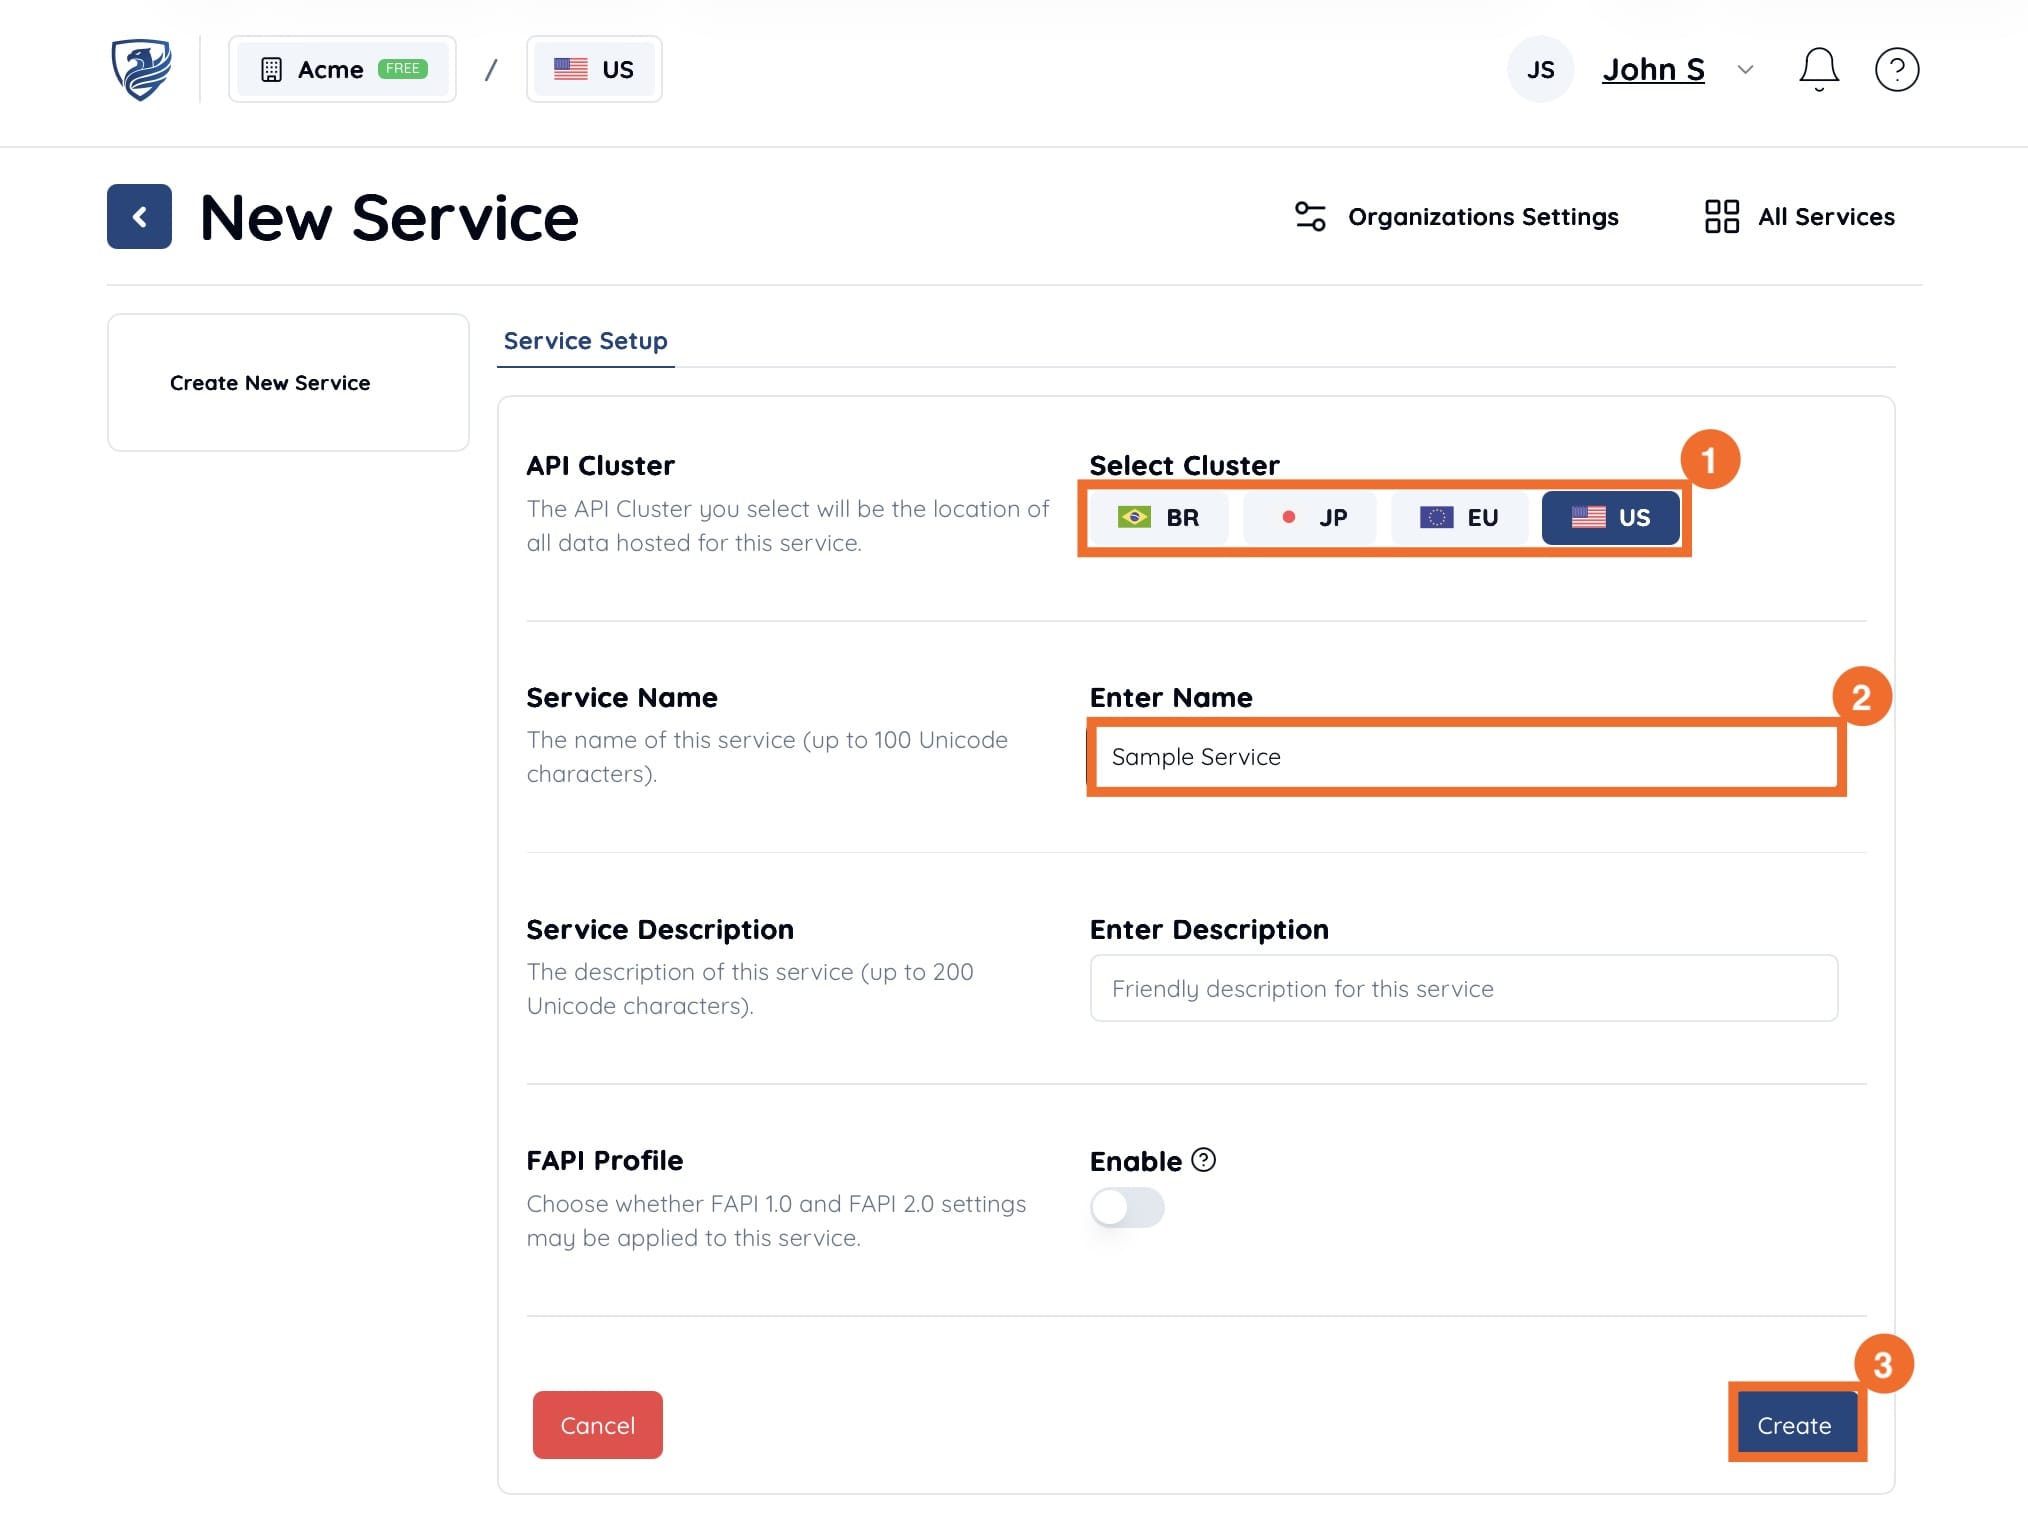
To create an Authlete service, first select an “API Cluster” (e.g., US) where the service will operate. All data for the service will be managed in the selected cluster. Choose a cluster based on your data residency requirements or environment separation needs (e.g., development, testing, or production).
Next, enter a “Service Name” (e.g., Sample Service). You can also specify “Service Description” and “FAPI Profile” as needed.
Once finished, click “Create.”
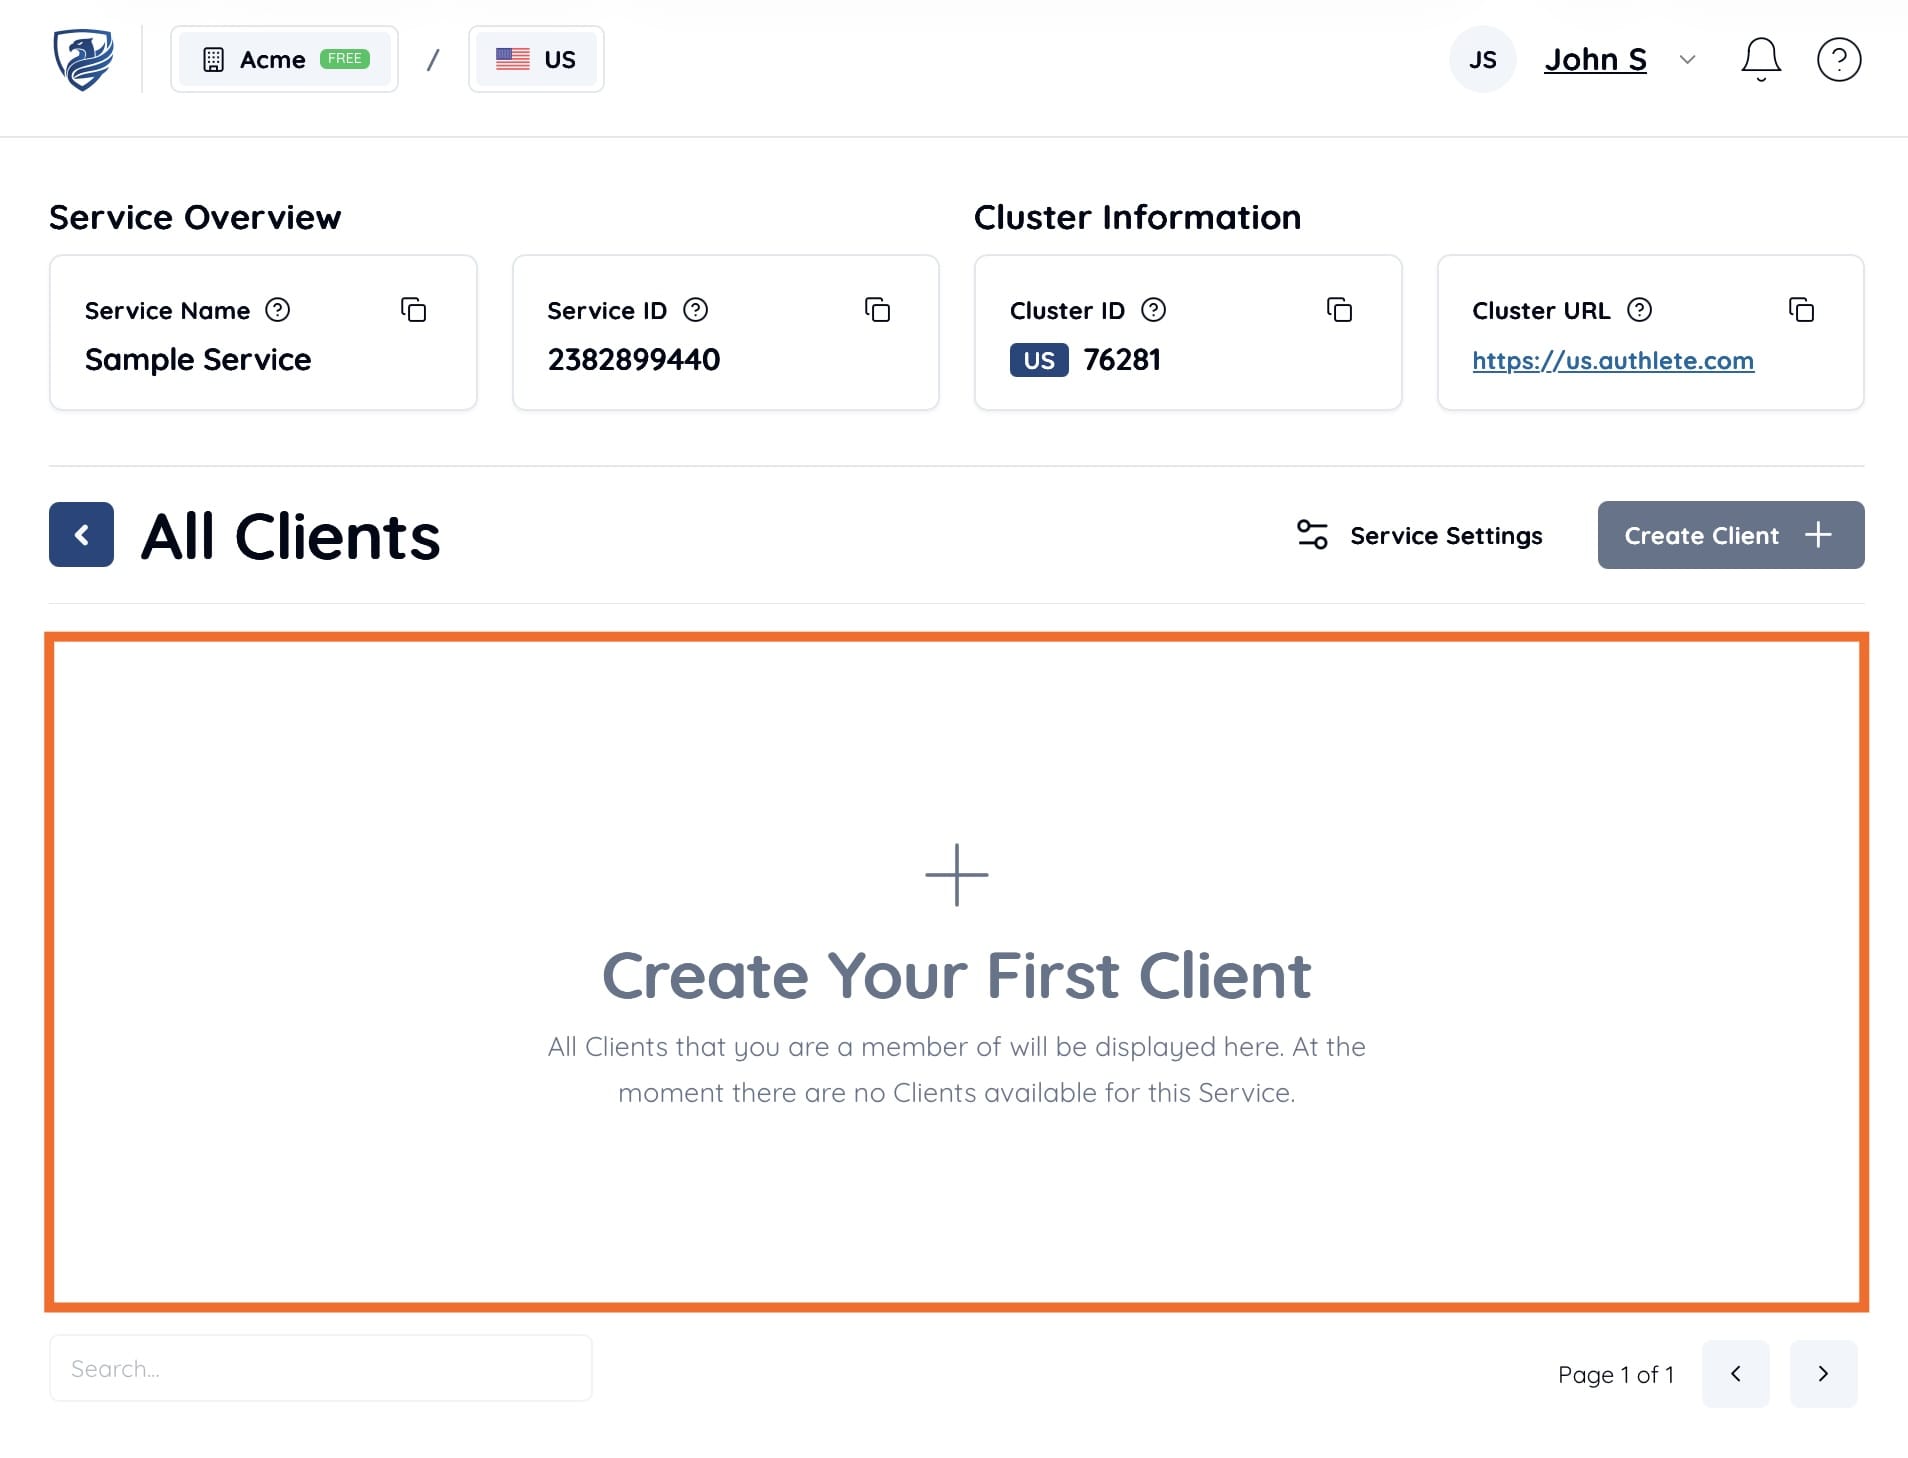
Once you have successfully created the service, the “Service Settings” page will appear. To use this service (i.e., to call Authlete APIs for implementing your OAuth/OIDC server), you must obtain a “Service Access Token” required for API requests.
In the “Access Token” section, enter a token name (e.g., Sample AS) and click “Create.” An access token will be generated.
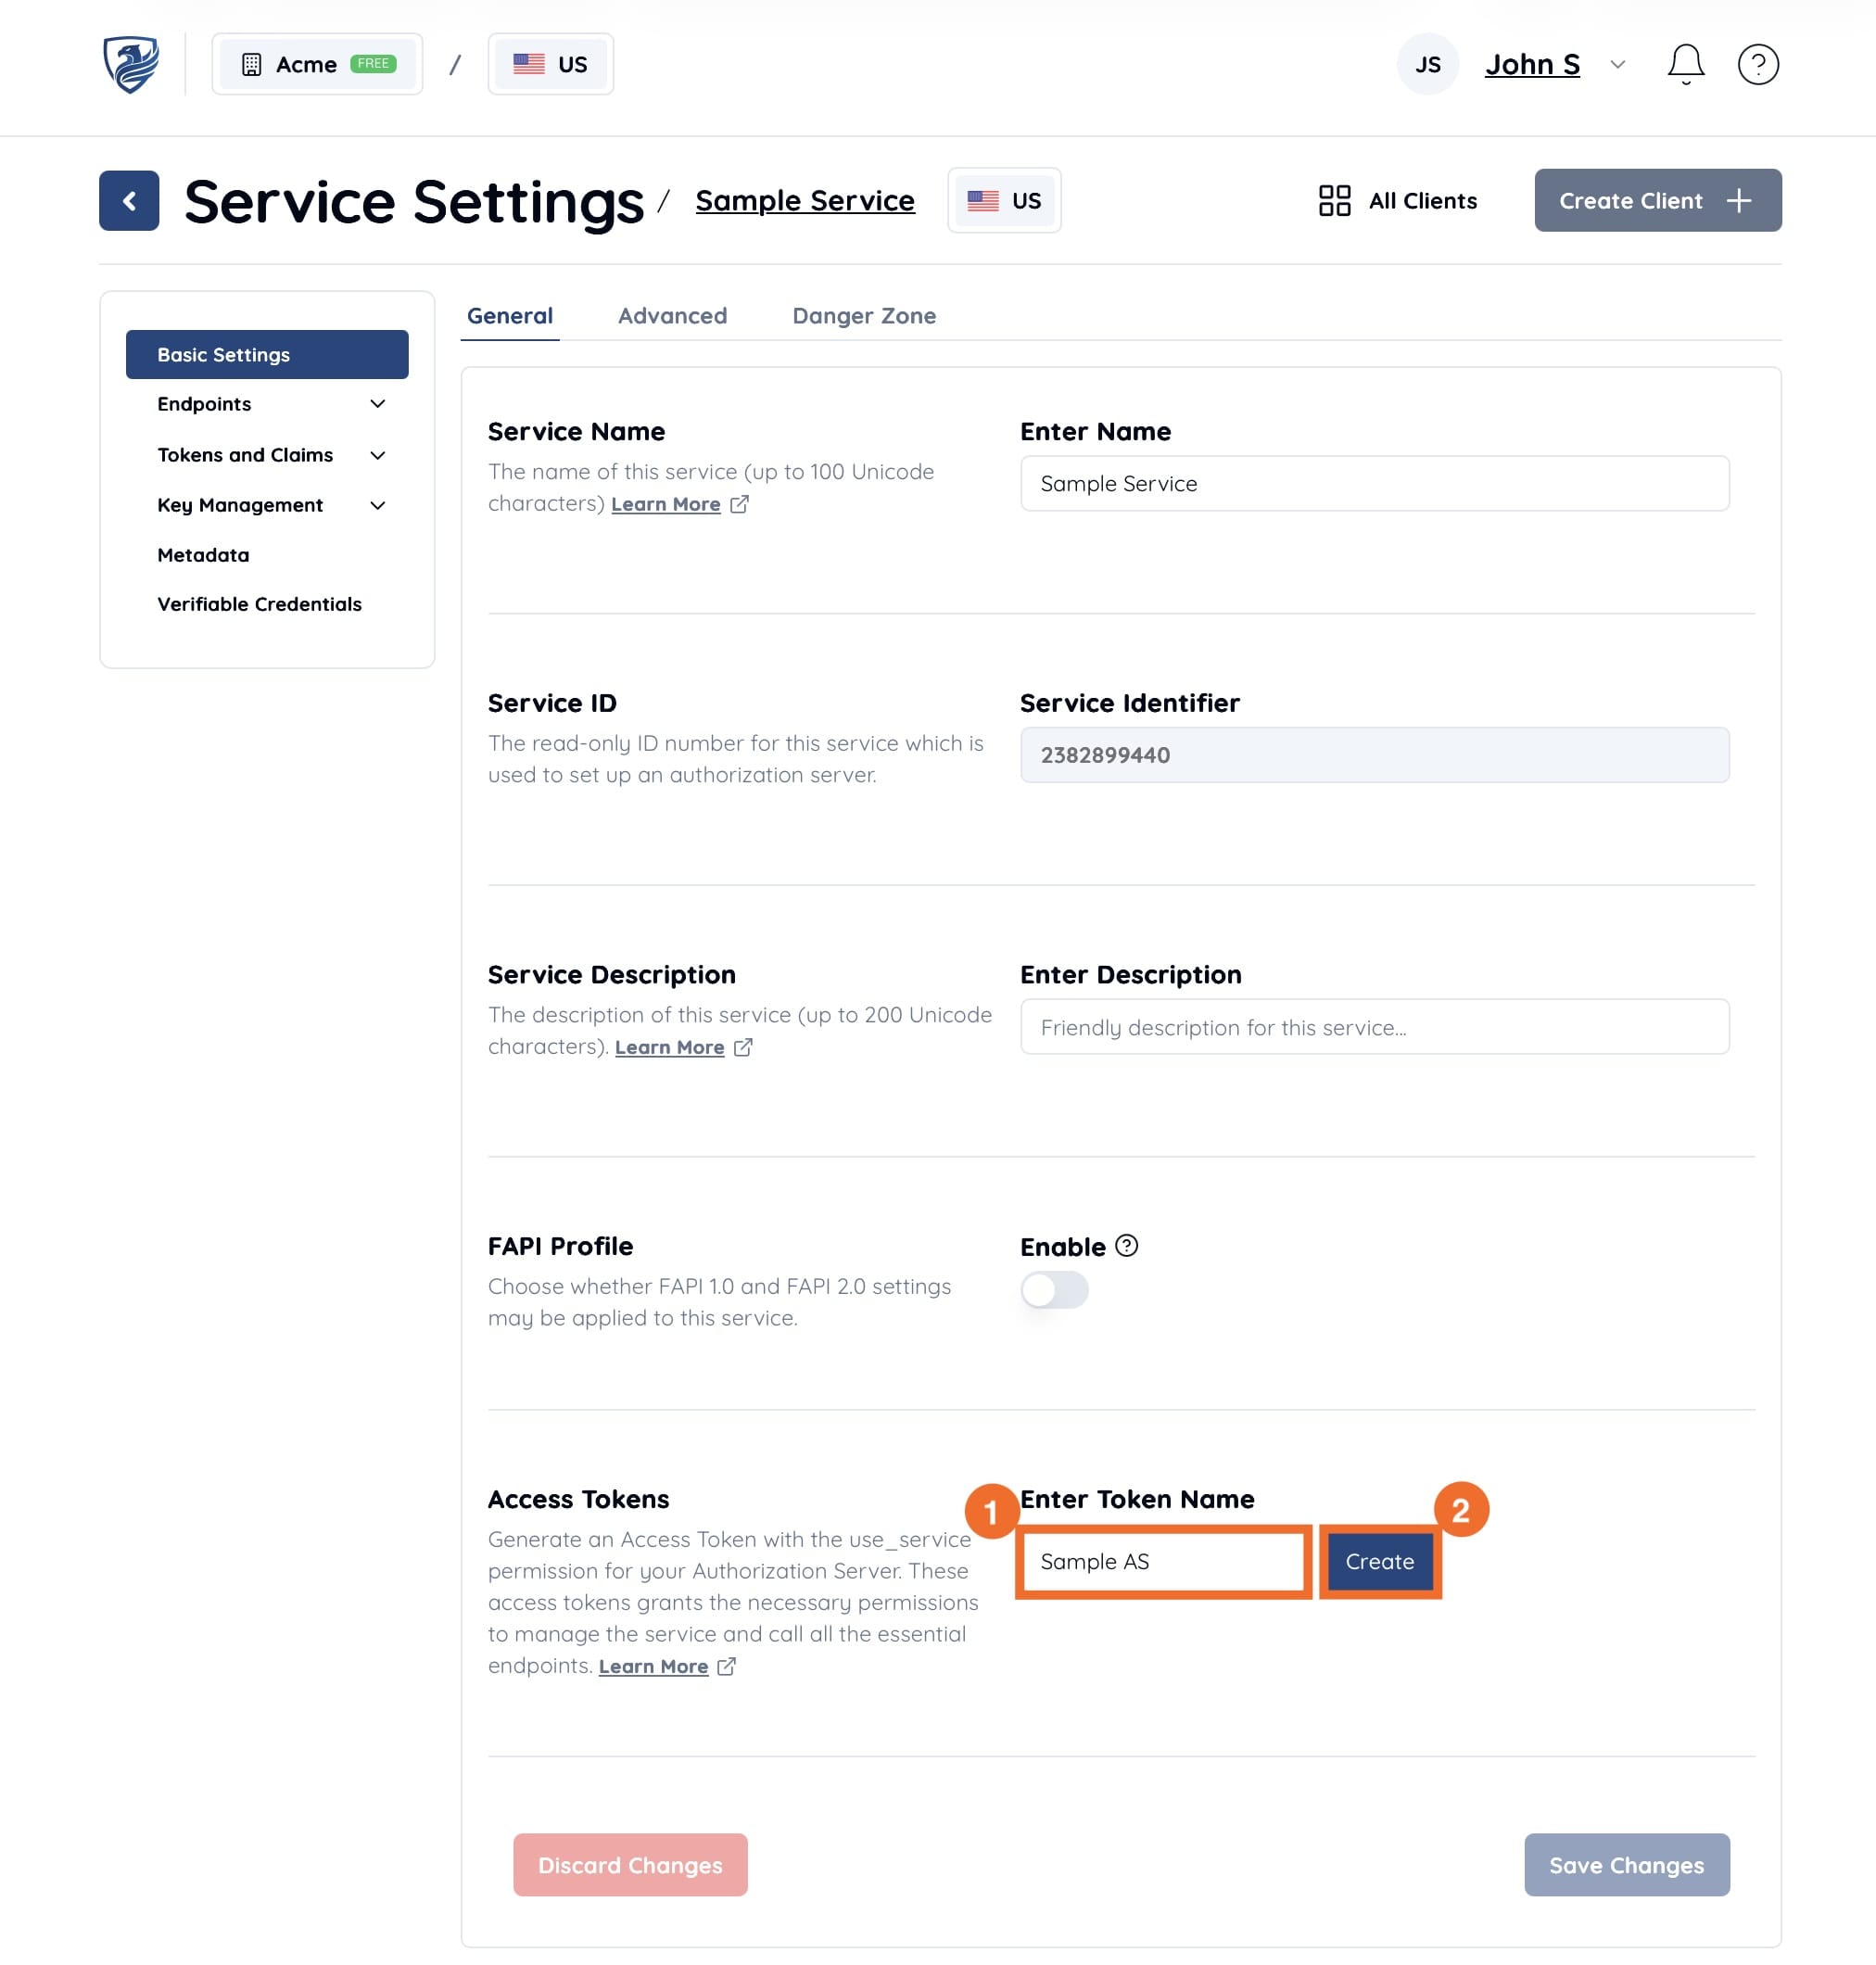
Click the “Copy” icon in the access token field and save the value (e.g., qwEF2t8gxW9MerraRyVtscDTKVPa66kjBBPUpBduvXw) for your records. Finally, click the “◀️” icon to the left of “Service Settings” to return to the Service Overview.

You are now ready to try the Authlete API.
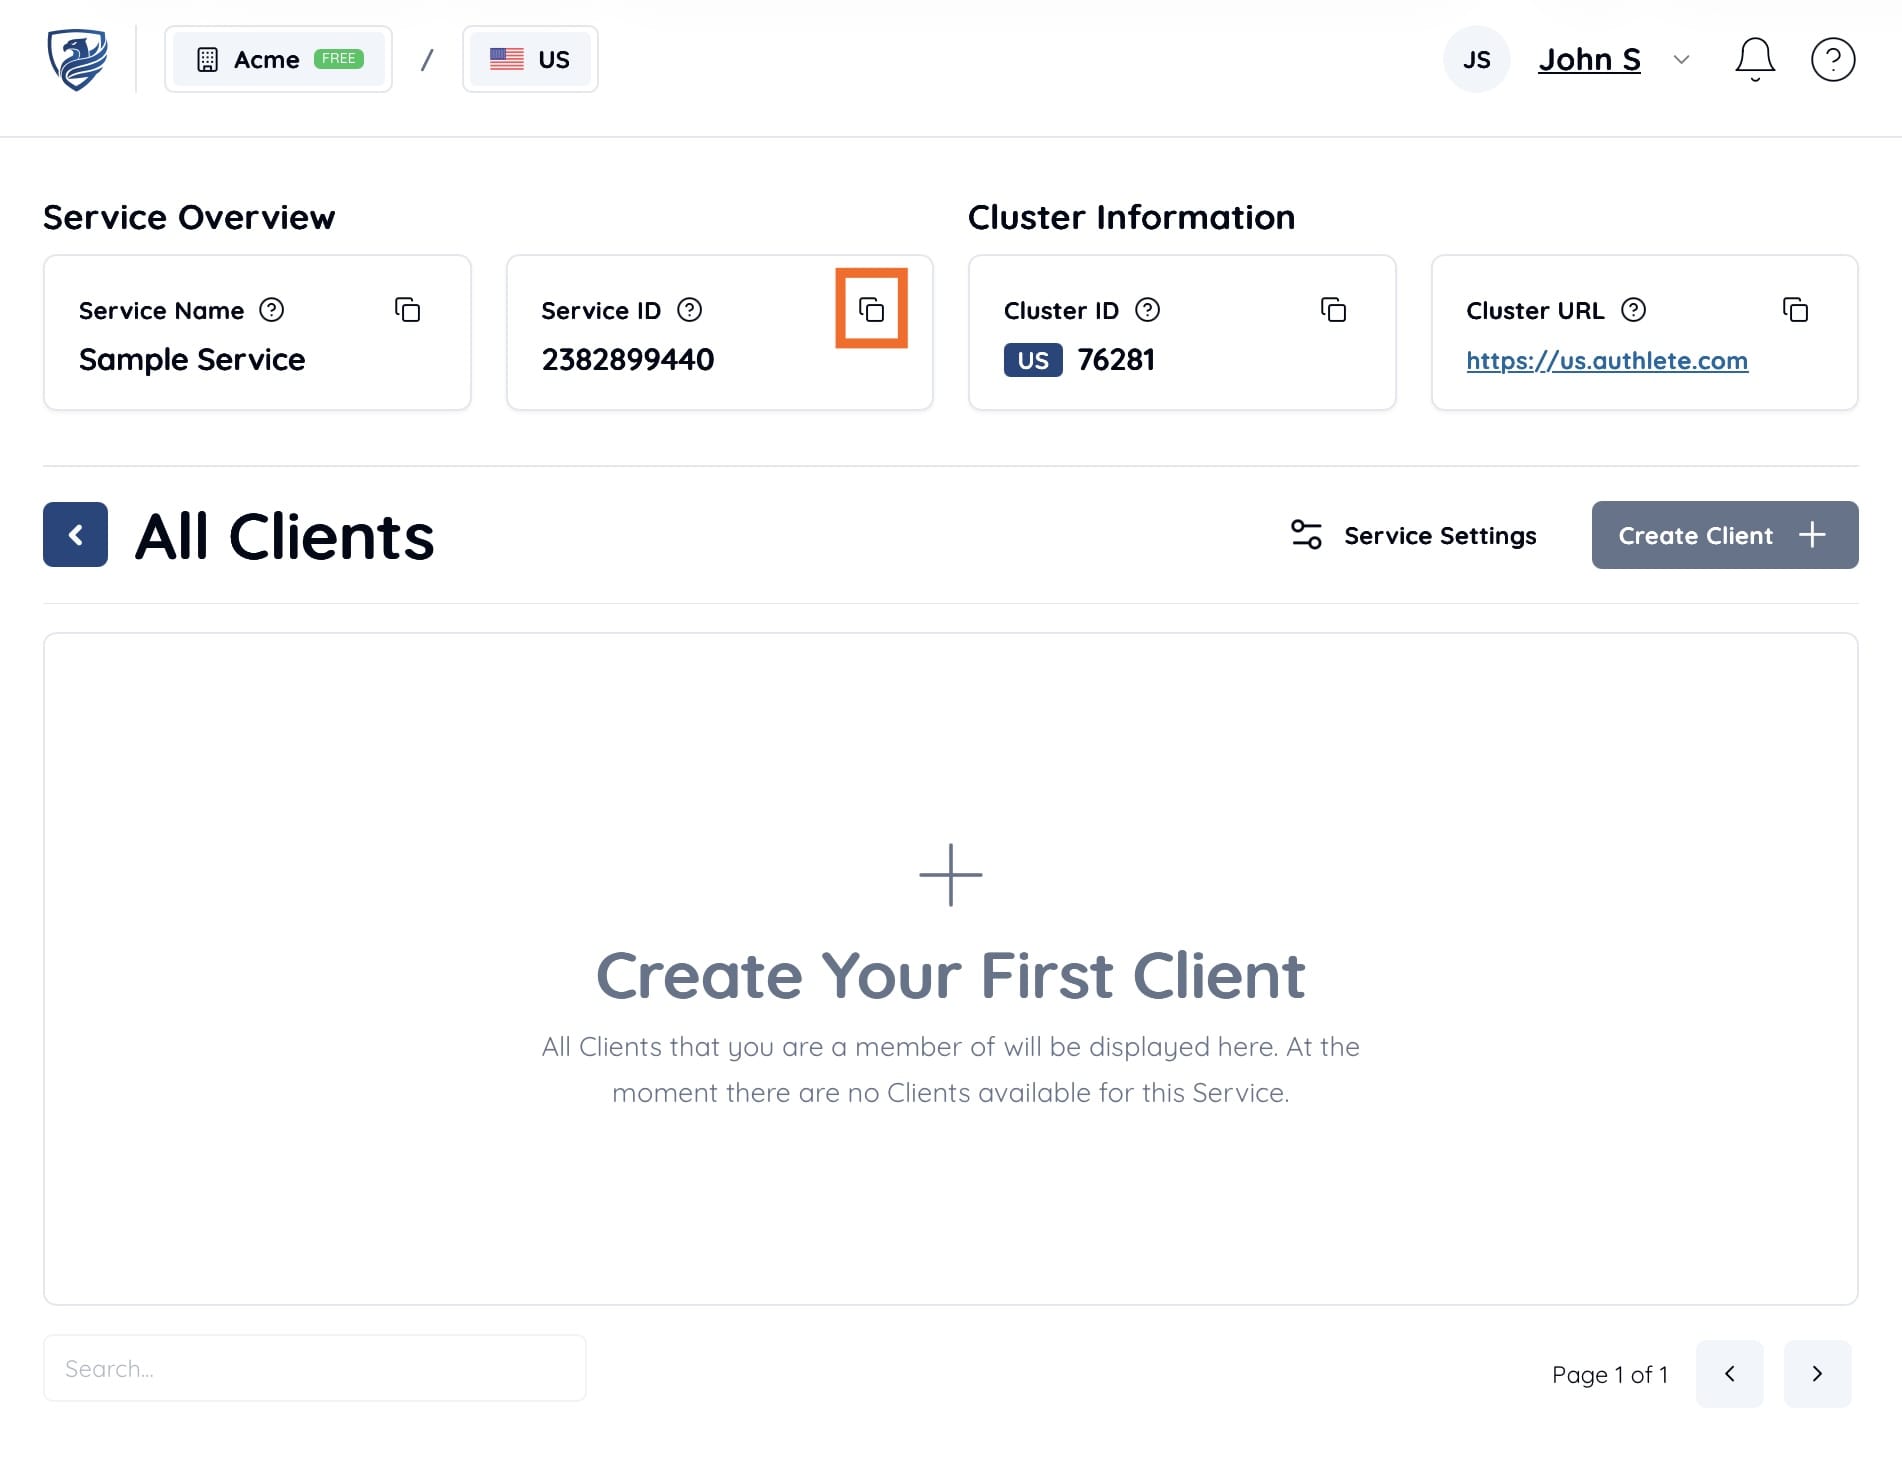
Most Authlete APIs require a “Service ID” in the request. You can find this on the “Service Overview” page. Click the “Copy” icon to copy the value (e.g., 3639904860).
Use the /service/configuration API (which generates configuration information for an OpenID Provider) to verify that your API request is successful.
Below is an example of sending a request using curl. Please update the values according to your environment.
| Parameter | Value (Example) |
|---|---|
| API Cluster Host | us.authlete.com |
| Access Token | qwEF2t8gxW9MerraRyVtscDTKVPa66kjBBPUpBduvXw |
| Service ID | 3639904860 |
Try sending an HTTP request as shown below:
# Linux/Mac
curl -X GET "https://us.authlete.com/api/3639904860/service/configuration" \
 -H "Authorization: Bearer qwEF2t8gxW9MerraRyVtscDTKVPa66kjBBPUpBduvXw"

# Windows
curl.exe -X GET "https://us.authlete.com/api/3639904860/service/configuration" `
 -H "Authorization: Bearer qwEF2t8gxW9MerraRyVtscDTKVPa66kjBBPUpBduvXw"
If the request is successful, you will receive an API response like the following:
{
  "issuer": "https://authlete.com",
    [...]
  "scopes_supported": [
    "address",
    "email",
    "openid",
    "offline_access",
    "phone",
    "profile",
    "grant_management_query",
    "grant_management_revoke"
  ],
  "response_types_supported": [
    "none",
    "code",
    "id_token",
    "code id_token"
  ],
[...]
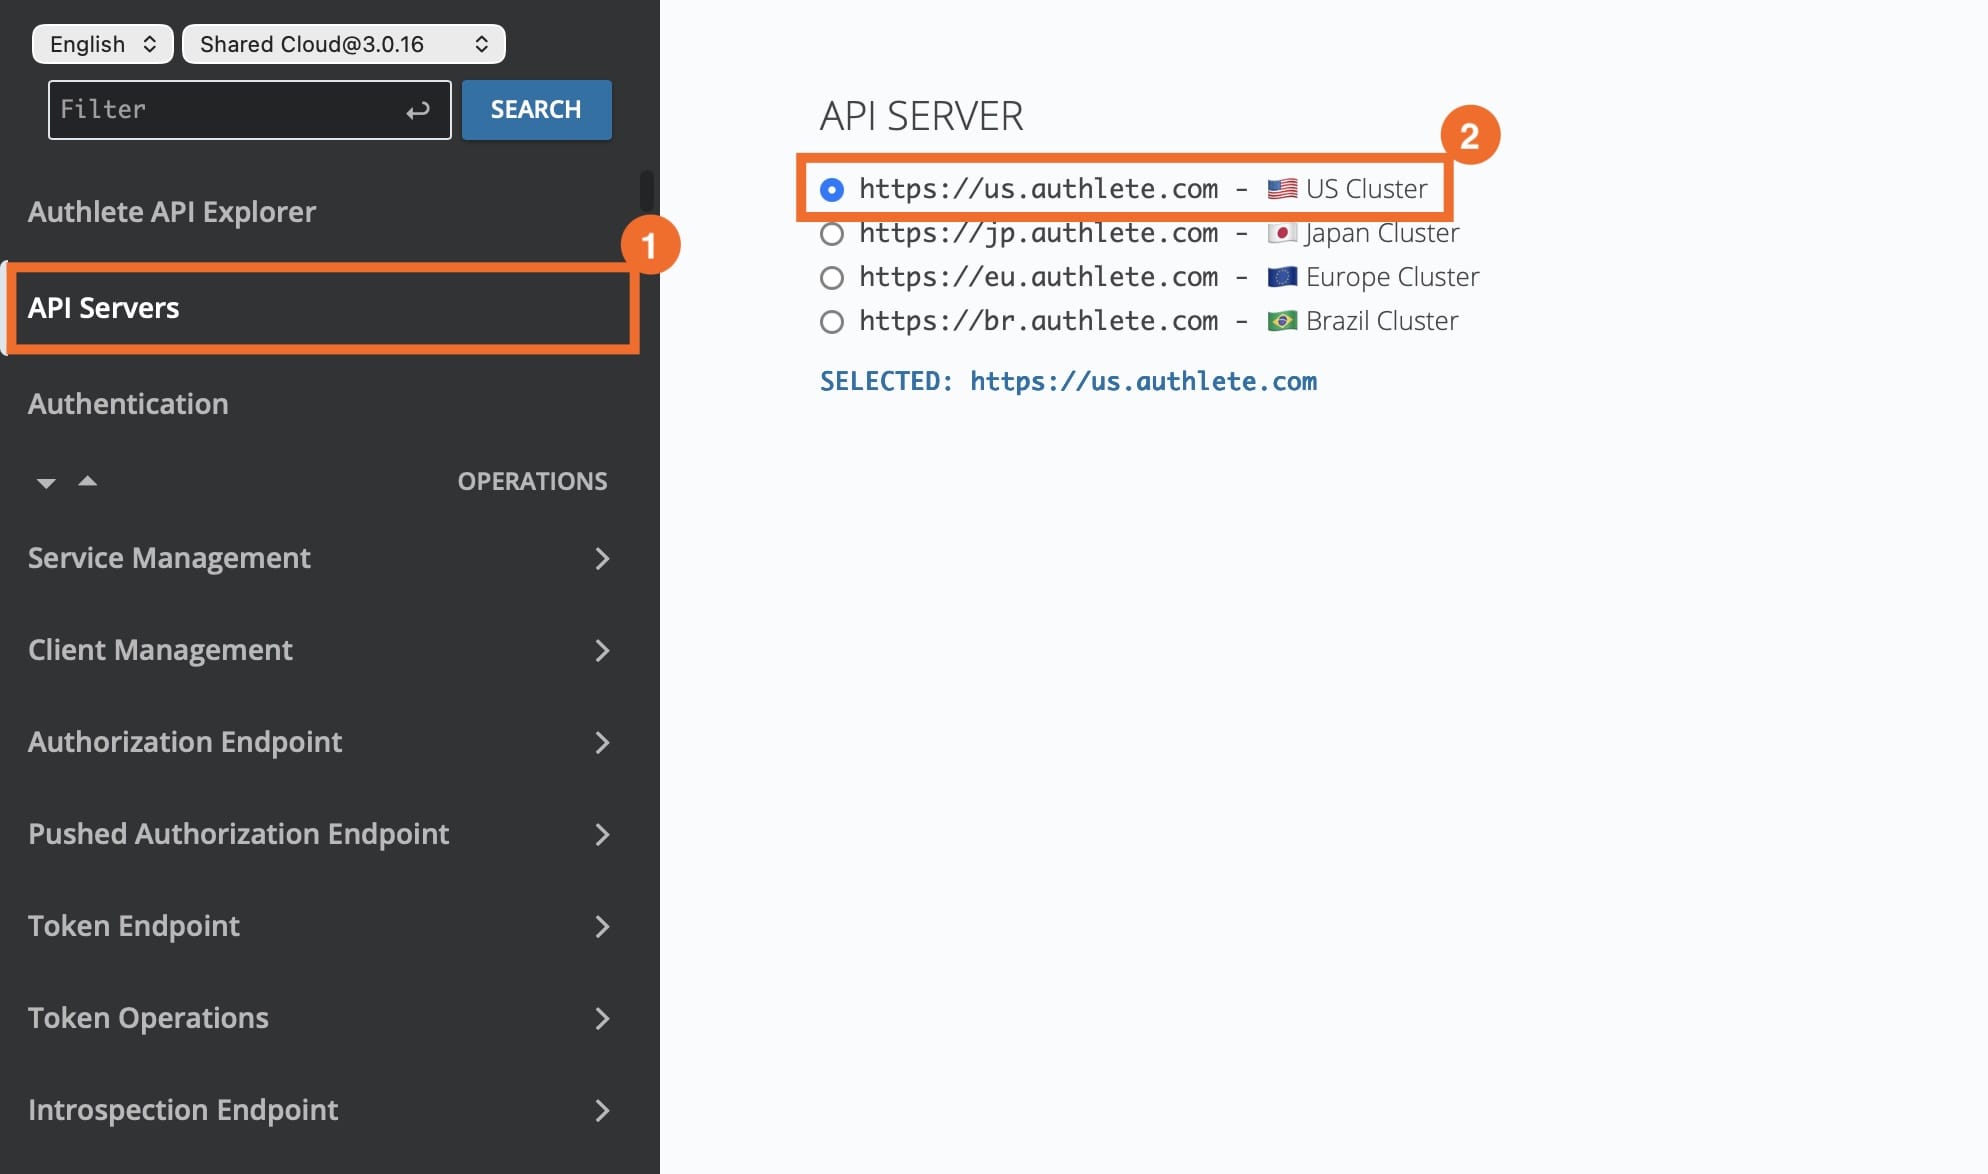
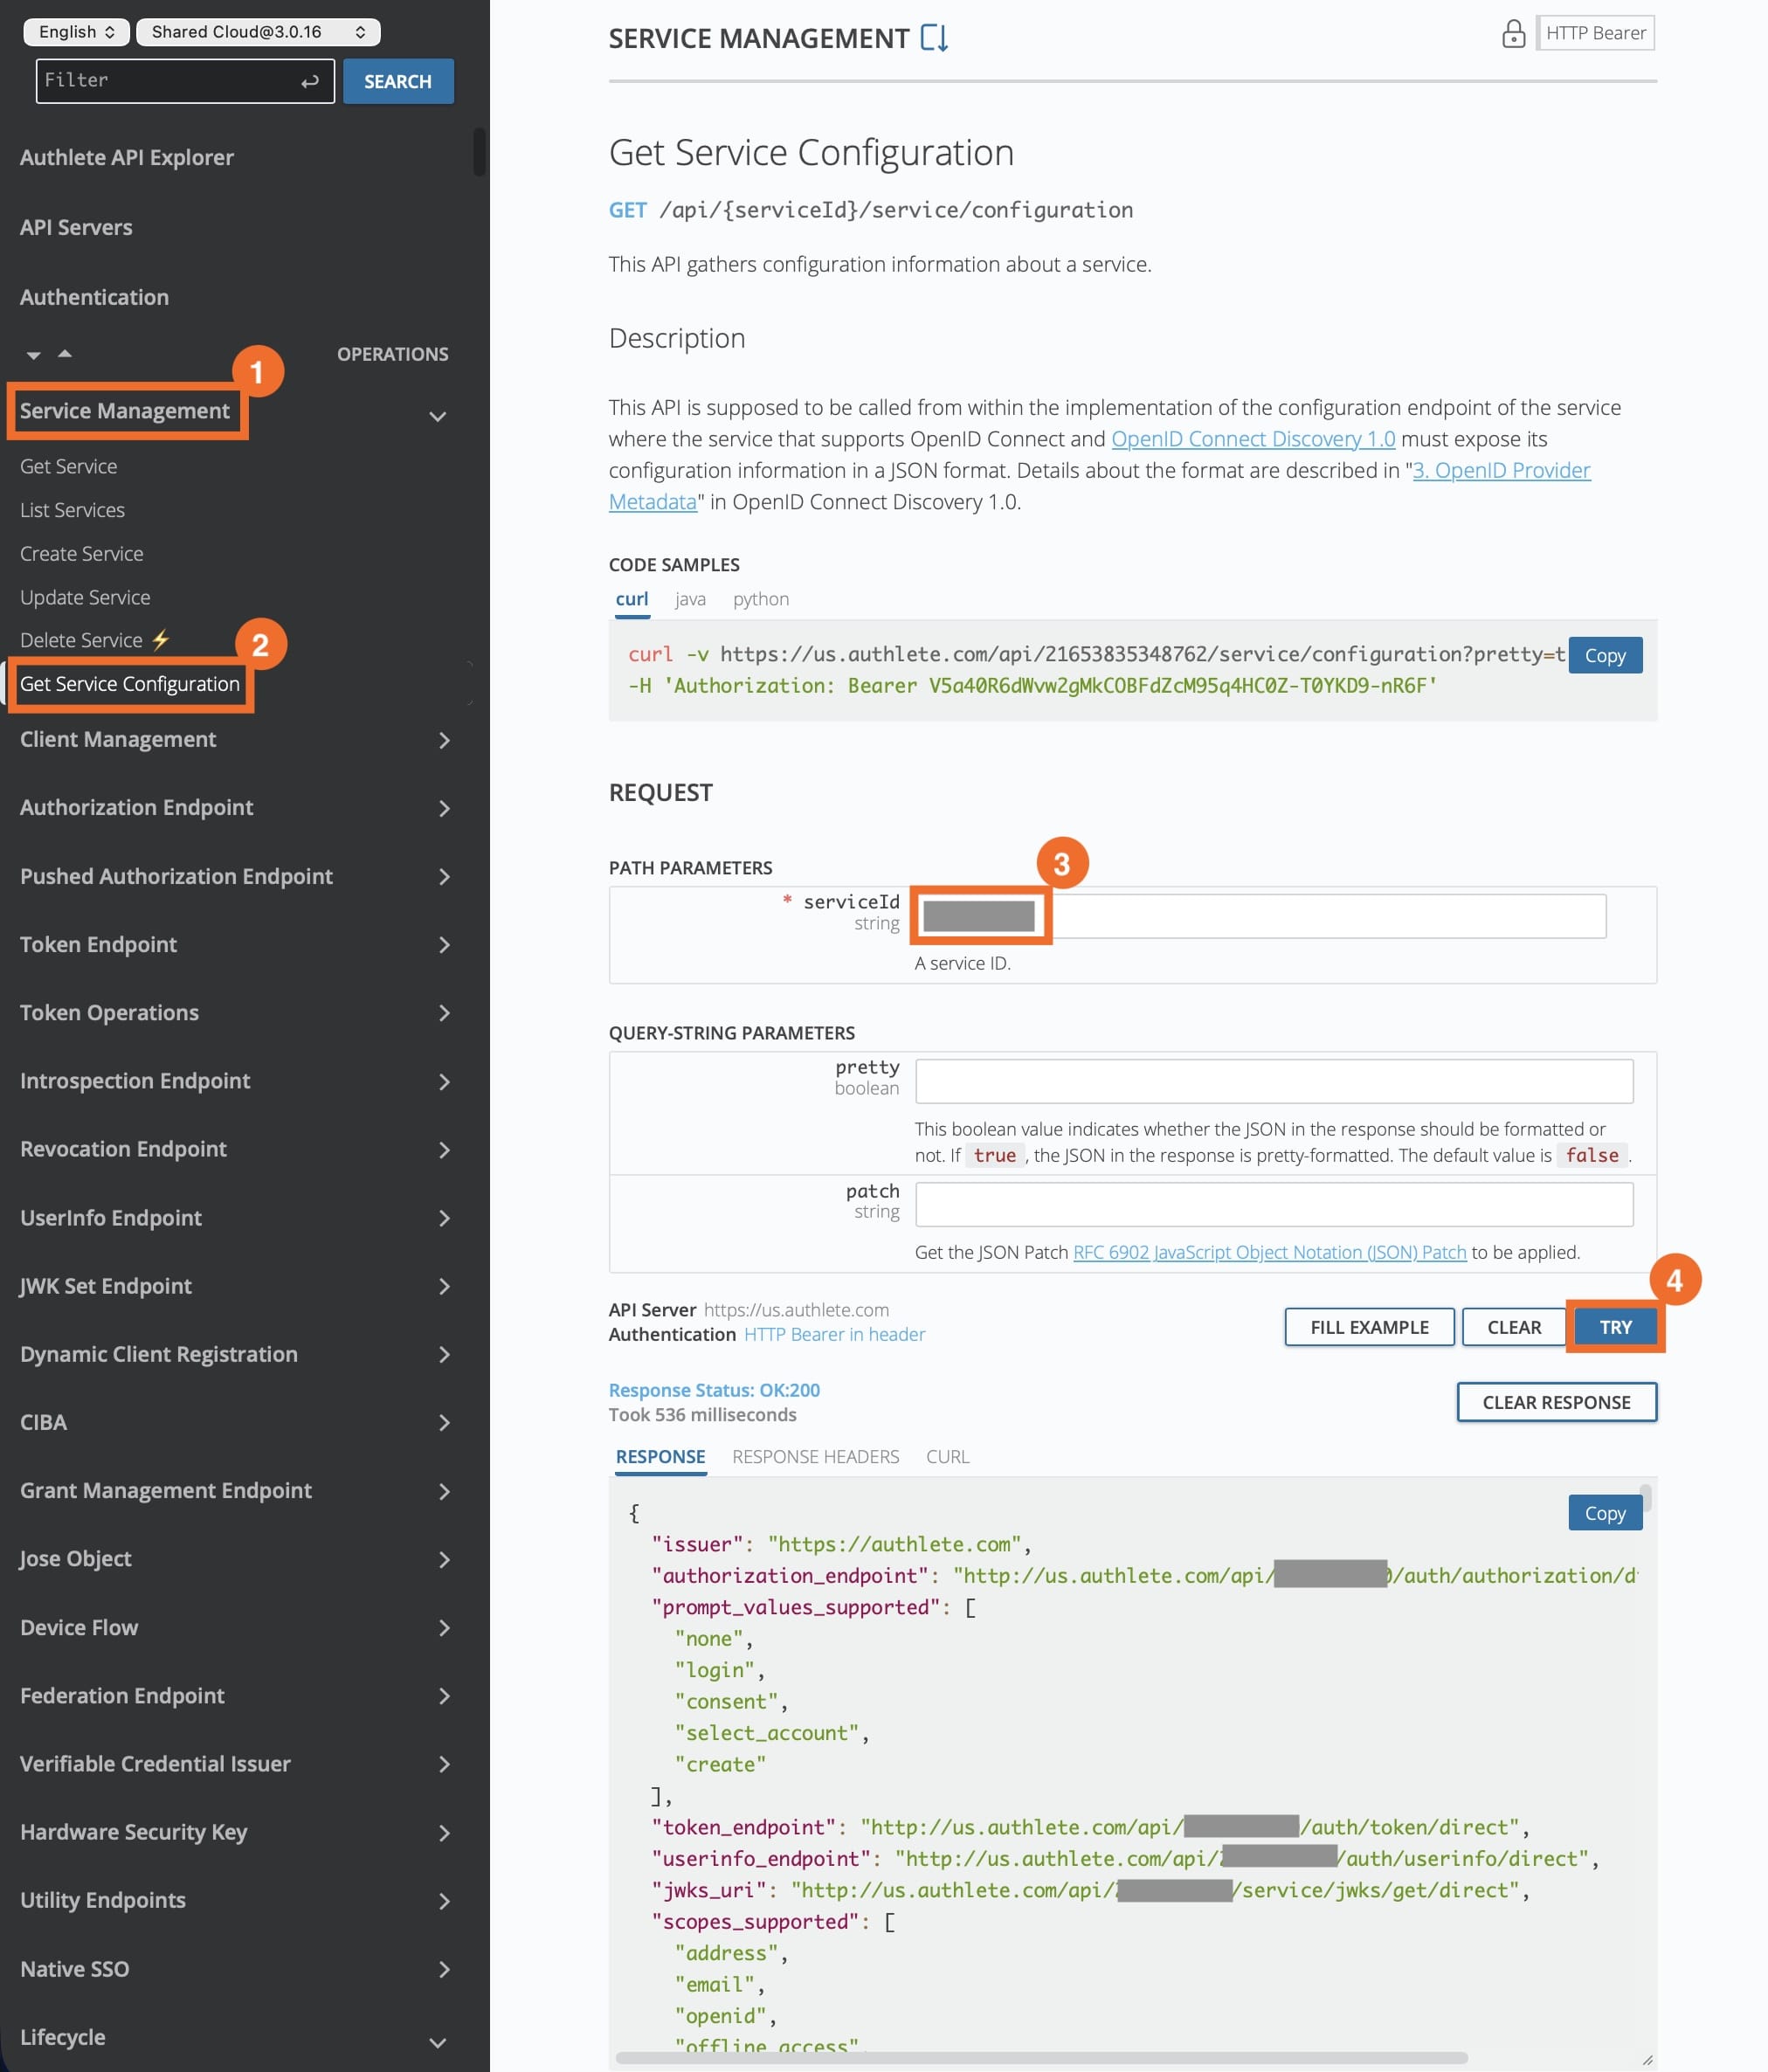
You can also try Authlete APIs interactively through the Authlete API Explorer.
Select API Cluster: Click “API Servers” in the left pane and select the cluster you want to connect to.
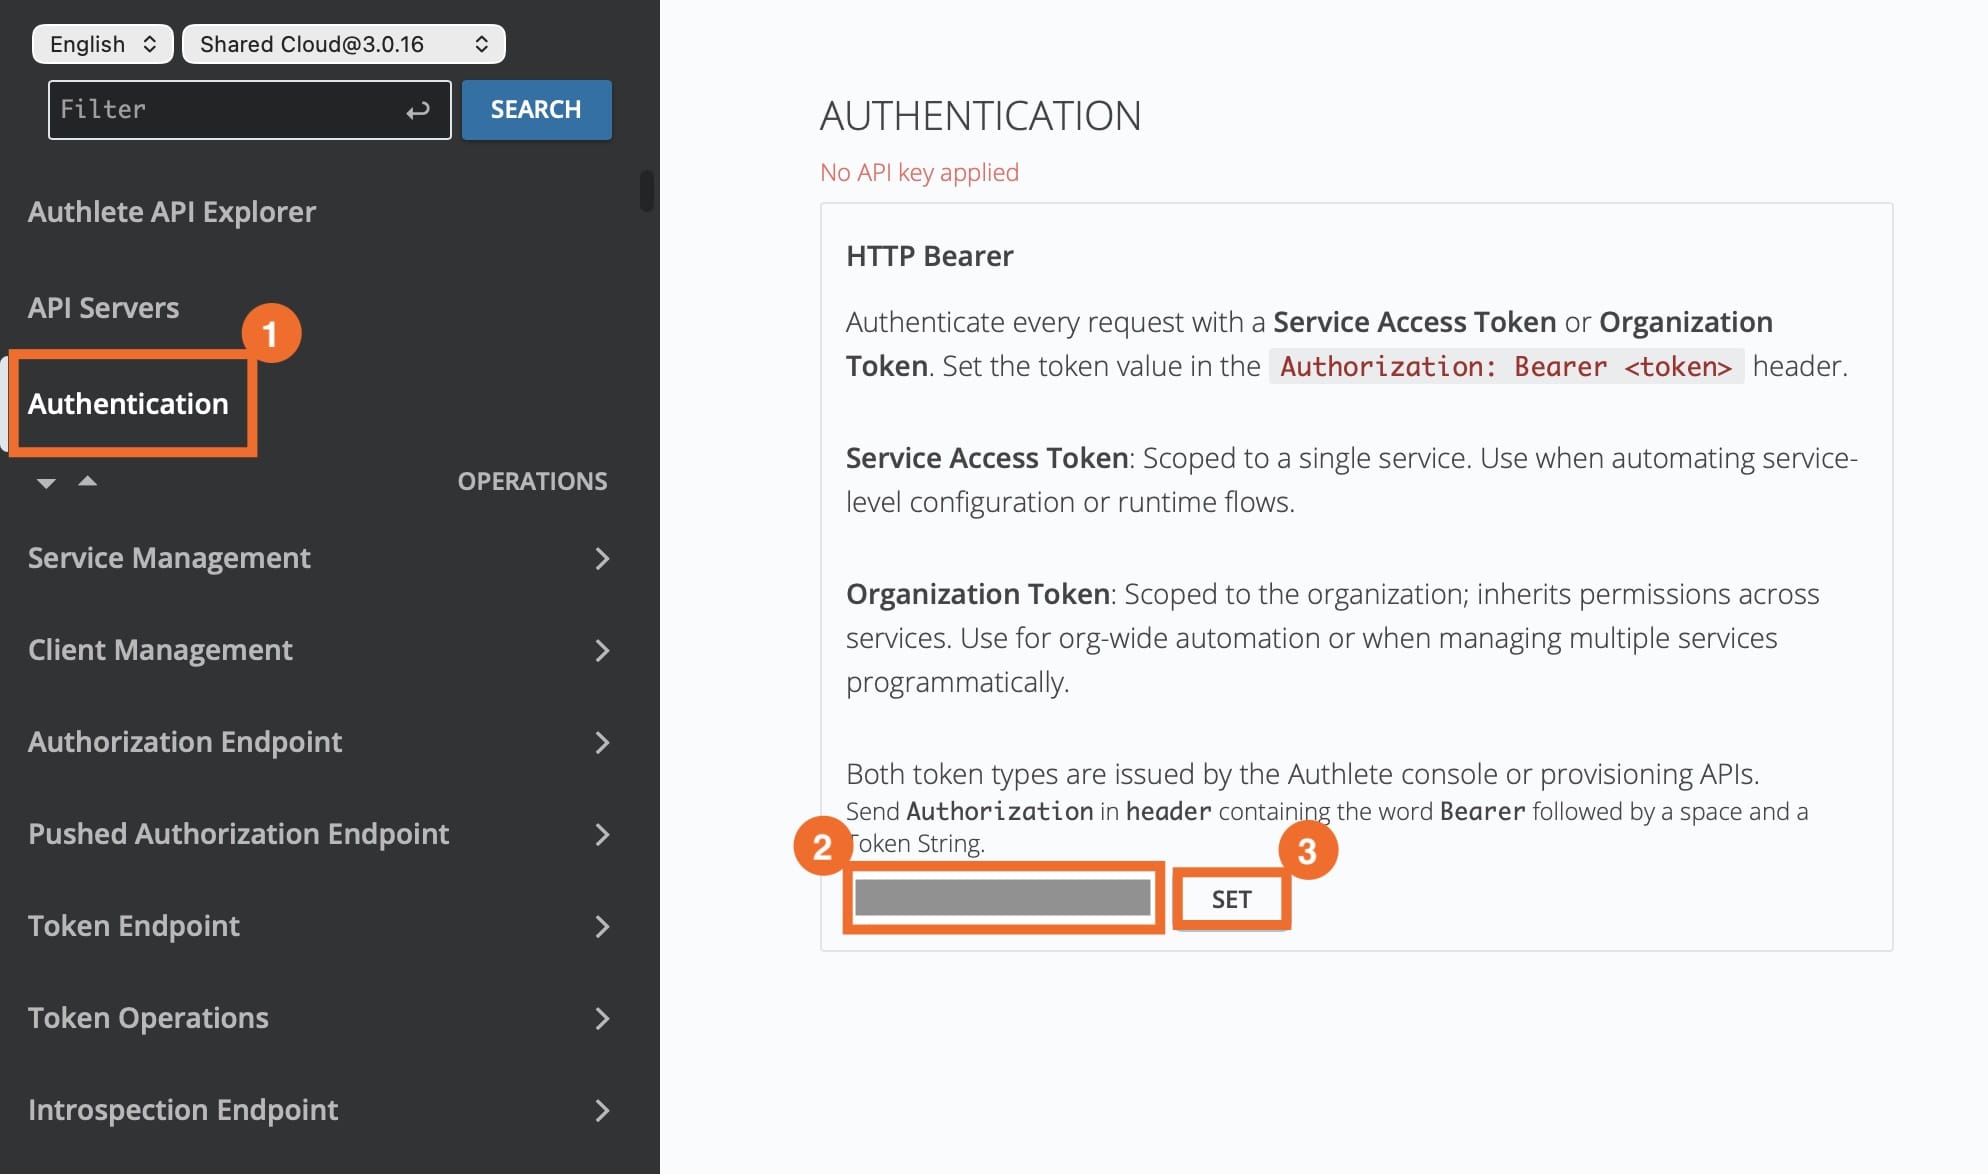
Set Access Token: Click “Authentication” in the left pane, enter your access token in the “HTTP Bearer” field, and click “SET.”
Try the API: Select an API (e.g., “Service Management - Get Service Configuration”), enter the required information (the Service ID), and click “TRY.”
If successful, the API response will be displayed in the RESPONSE section at the bottom.
Congratulations! You have successfully completed the initial setup and verified your connection to the Authlete API. To begin your full-scale implementation, we recommend the following resources:
To register your first client information, click “Create your first client” on the summary page of the service you created.